NHS website API migration guide
Contents
- Introduction
- Step one: registering with the NHS Digitial developer hub
- Step two: setting up your application in the integration test environment
- Step three: onboarding your product
- Step four: setting up your application in the production environment
- Get support from our team and other API users
Introduction
The NHS website APIs are being migrated to give users tools they need that are not available on the current developer portal as well as offering improved documentation.
The new platform hosts many NHS APIs. It enables sandboxing environments and has an online developer community where API users can communicate with each other and get advice.
The main changes:
-
Change of the URL link to access information about the APIs
OLD: https://developer.api.nhs.uk/nhs-api
NEW: https://digital.nhs.uk/developer/api-catalogue/nhs-website-content/v2 - To implement the API, you need to change the endpoints you are currently using to consume the NHS.uk APIs. You will need to change this from 'https://api.nhs.uk/' to 'https://api.service.nhs.uk/nhs-website-content/'
- A new dedicated community where you can get advice and support from other API users, the Developer Community page - https://developer.community.nhs.uk/
Please note that to use the NHS Website Content API you will not need:
- An ODS code
- To register with the NHS England National Service Desk and have an incident management process
- To meet the functional requirements of the API
- To supply a valid use case
You may have seen these referred to in other documentation. However, these are only required if you are requesting to use other APIs.
The existing APIs will not be switched off until all users have had a chance to migrate. The existing APIs will also continue to work for a time after the new APIs have become available.
From speaking to syndication service users, we have found that a month's notice before the migration is sufficient for users to get ready to migrate across. Also, to ensure business continuity, for a period of 3 months from the start of the migration, both platforms will run concurrently.
For more general information about the migration, see the API migration frequently asked questions.
NHS Website Content API v2
The new NHS Website Content API v2 is made up of the following NHS website APIs:
- Health A to Z (conditions)
- Medicines A to Z
- Mental health
- Live Well
- Pregnancy
- NHS Services (a textual description of services within the NHS, not data about individual services)
- Contraception
- Vaccinations
- Women's health
You will only need to sign up to one API to consume content from any of these old APIs. All functionality is unchanged. You will also only need one key to access the API.
You can find the technical specification for the Content API v2 at NHS Website Content API v2 - NHS Digital. This contains information that will support you to implement the API.
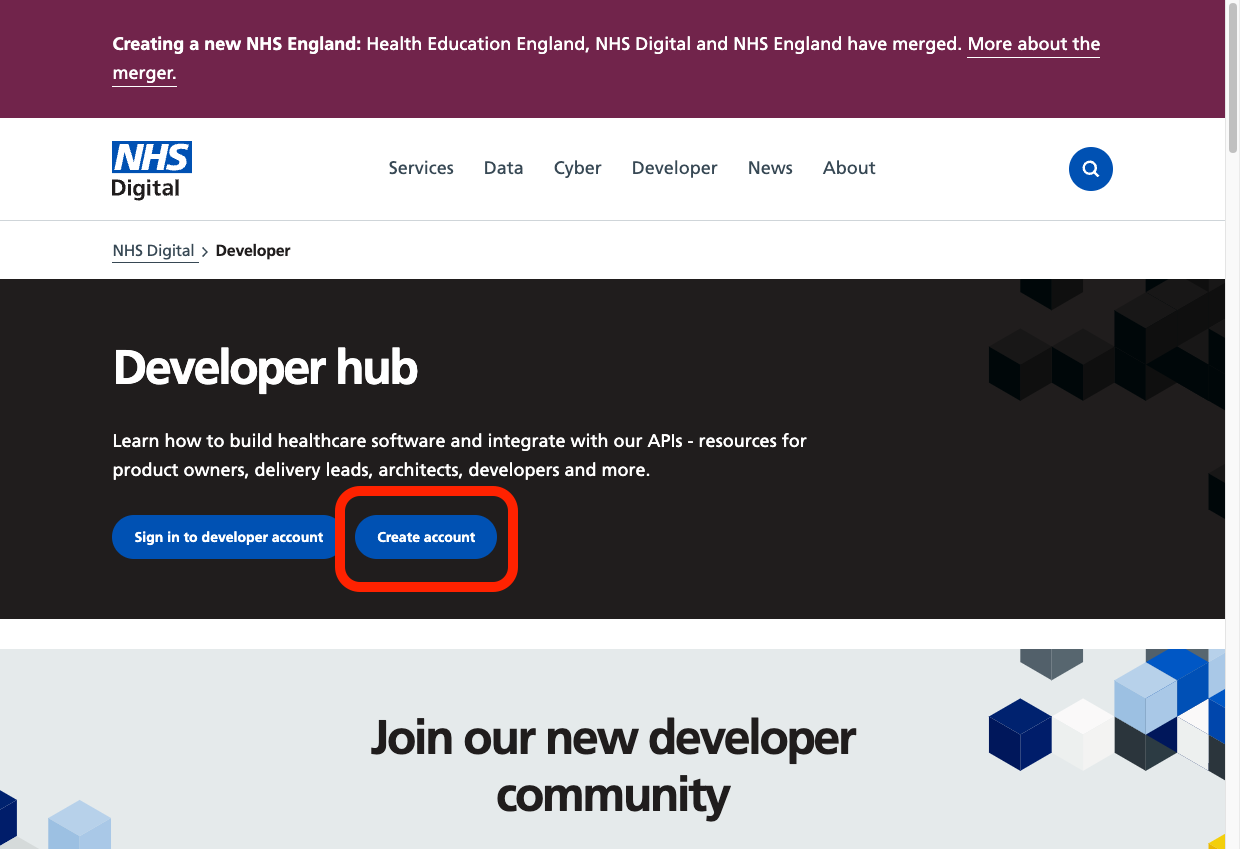
Step one: registering with the NHS Digital developer hub
You will first need to register at the NHS Developer and Integration hub.
You only need one designated user account for your organisation. You should not set up separate user accounts for everyone in your team.
Later in the process, you will be able to add your colleagues to a team.
You will need to enter some details about yourself and your organisation.
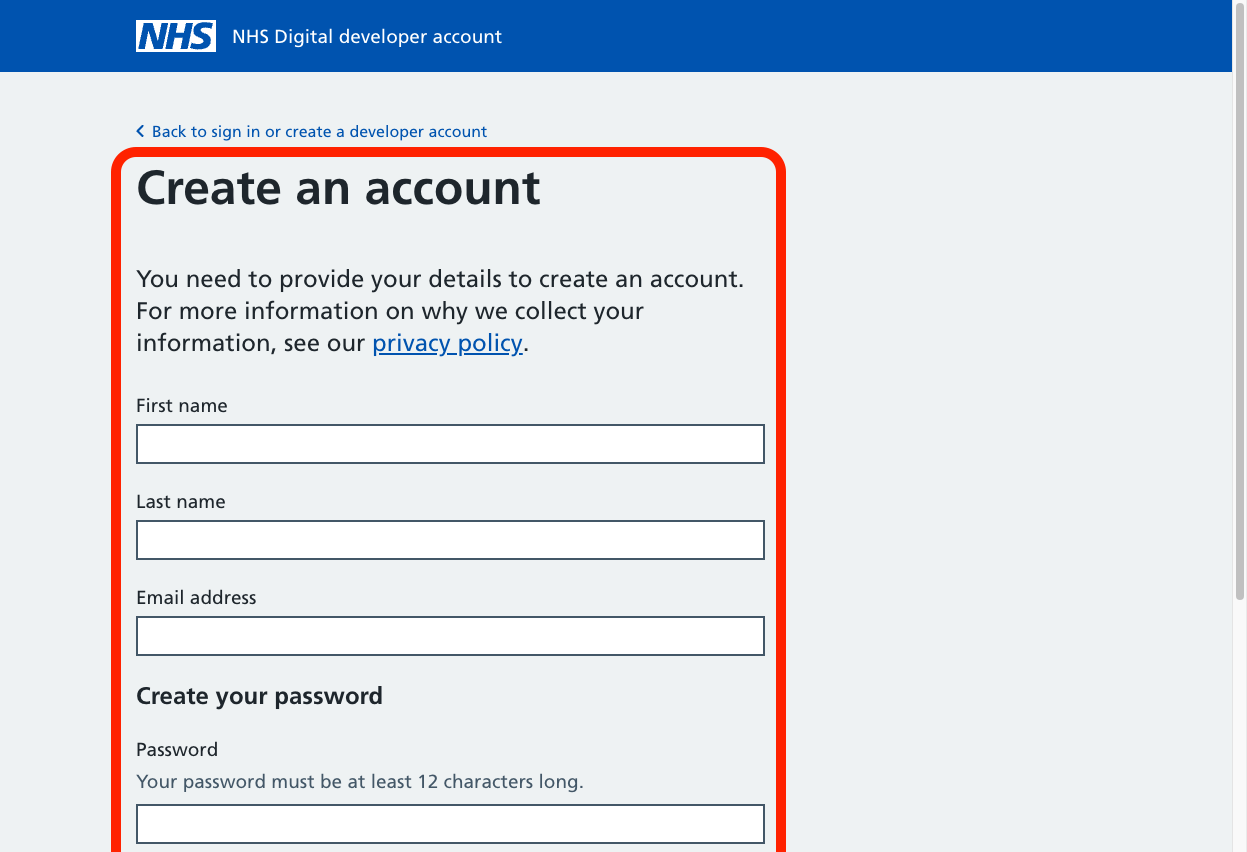
Then you will need to agree to the general terms for the hub.

Finally, you need to get an activation email.

Step two: setting up your application in the integration test environment
You will then need to set up your application to start using the new API. There are two stages to getting set up, which you should follow in the order given in this guide.
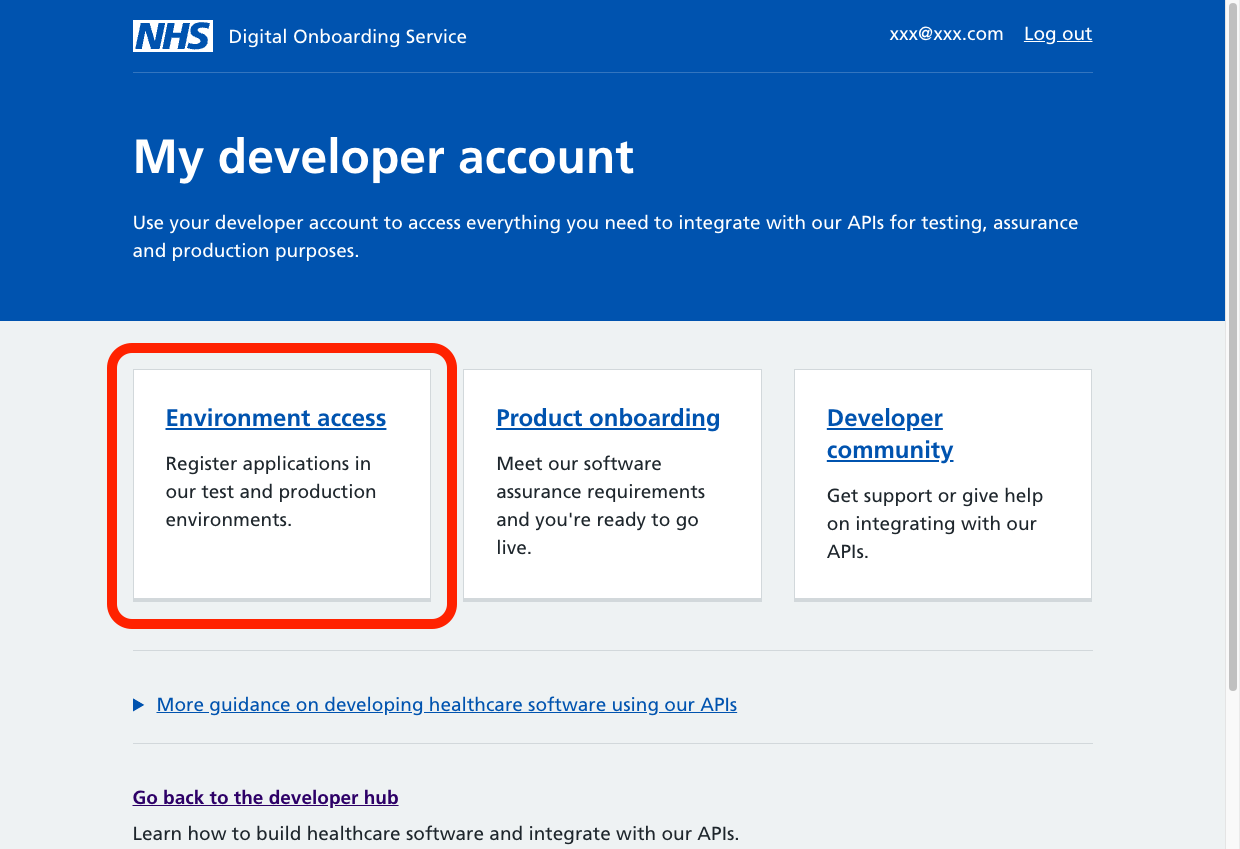
Click the 'Environment access' link.
Click 'Add new application'.
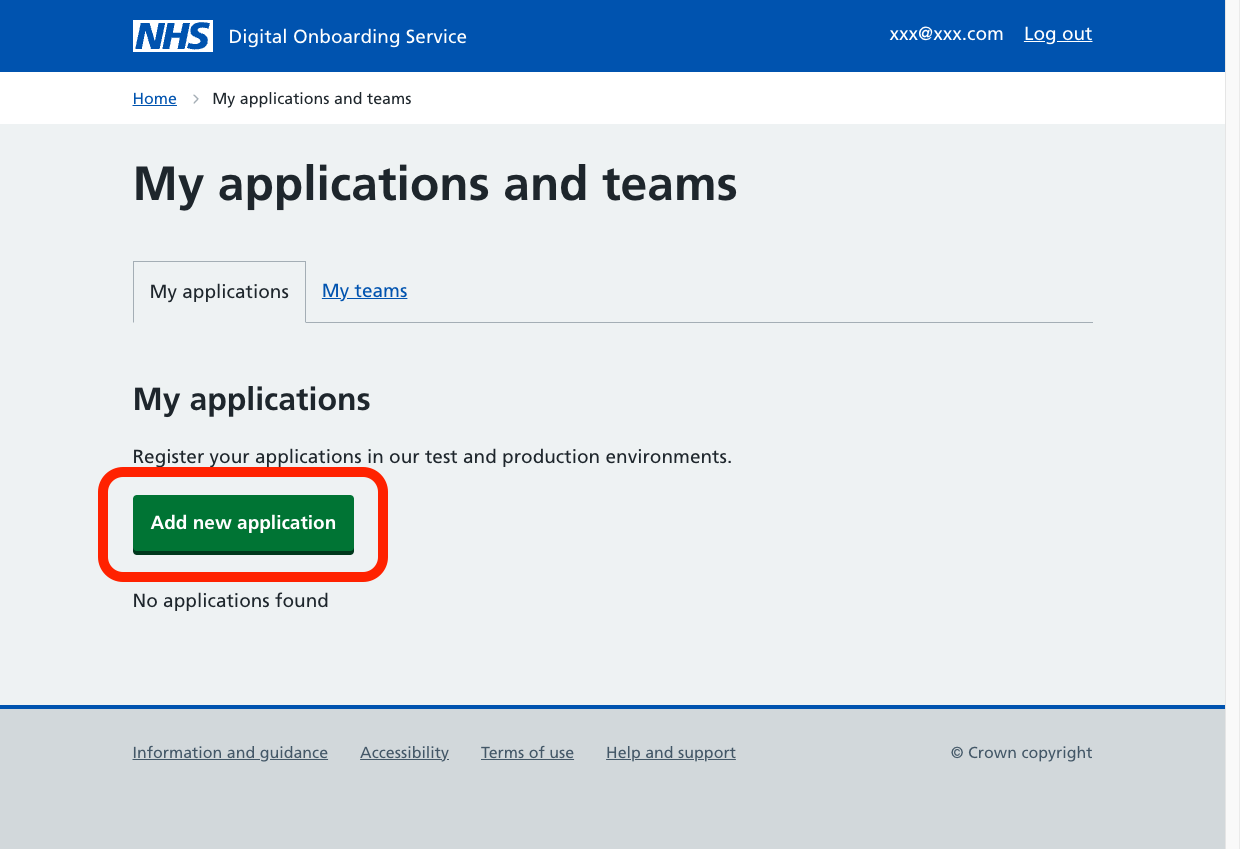
You will need to set up a new application for each environment you want to use.
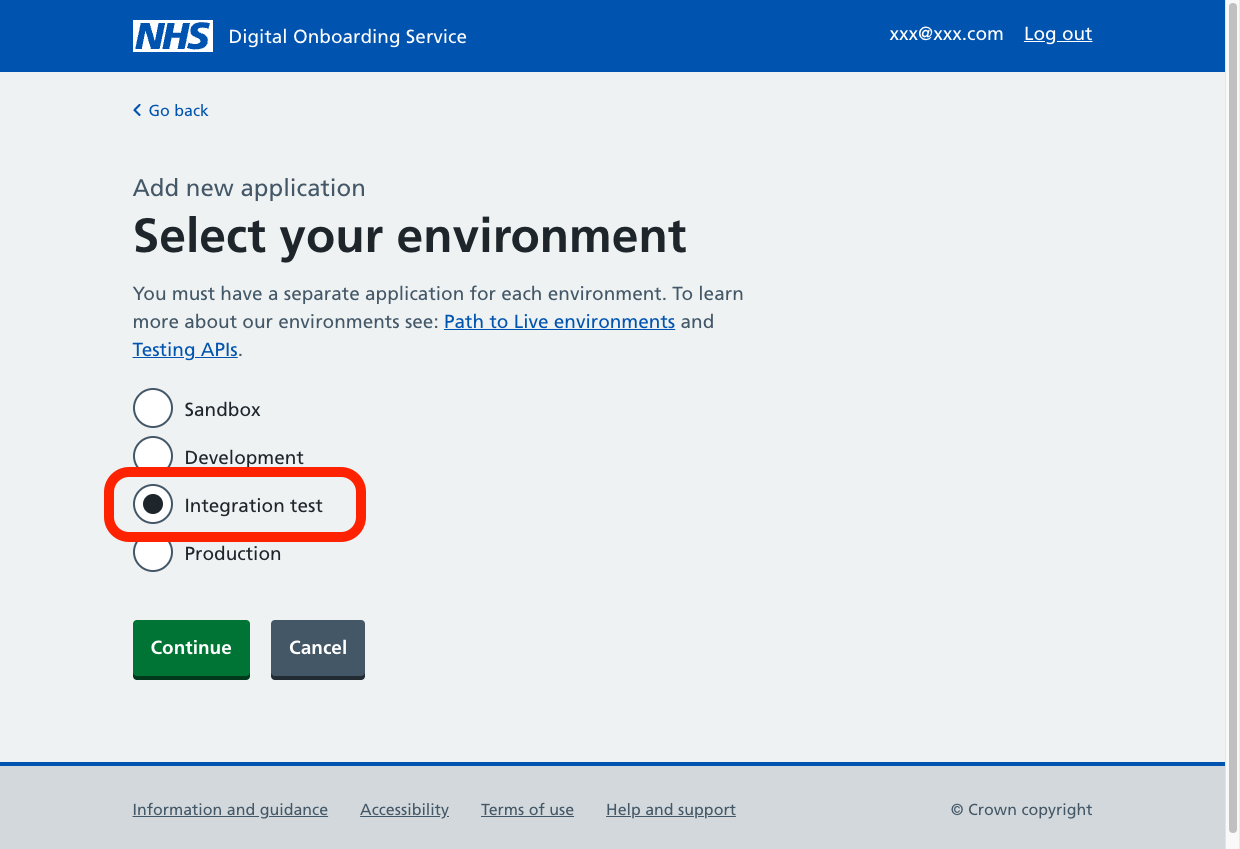
Set your application up in the integration test environment initially, so you can test the API before implementing it. Do not use the 'development' environment.
There are four environments in the list to choose from for your application. Select the integration test environment when you are starting to set up your application.
Environments
- Sandbox - if you are registering to use our APIs, do not choose this environment. This is just for developers to test their own applications.
- Development - this environment enables developers to create and innovate without breaking something in a real development. If you are registering to use our APIs, do not choose this environment.
- Integration test - this is the option that must be chosen if you are registering to use any of our APIs. Use this environment to test your use of the API but do not use this environment in a live product.
- Production - if you are registering to use our APIs, do not choose this environment until you have tested your use the API and are ready to publish content from the API to a live product. When you are using the API to publish content to a live product, you should only use the production environment.
Select the 'Integration test' environment.
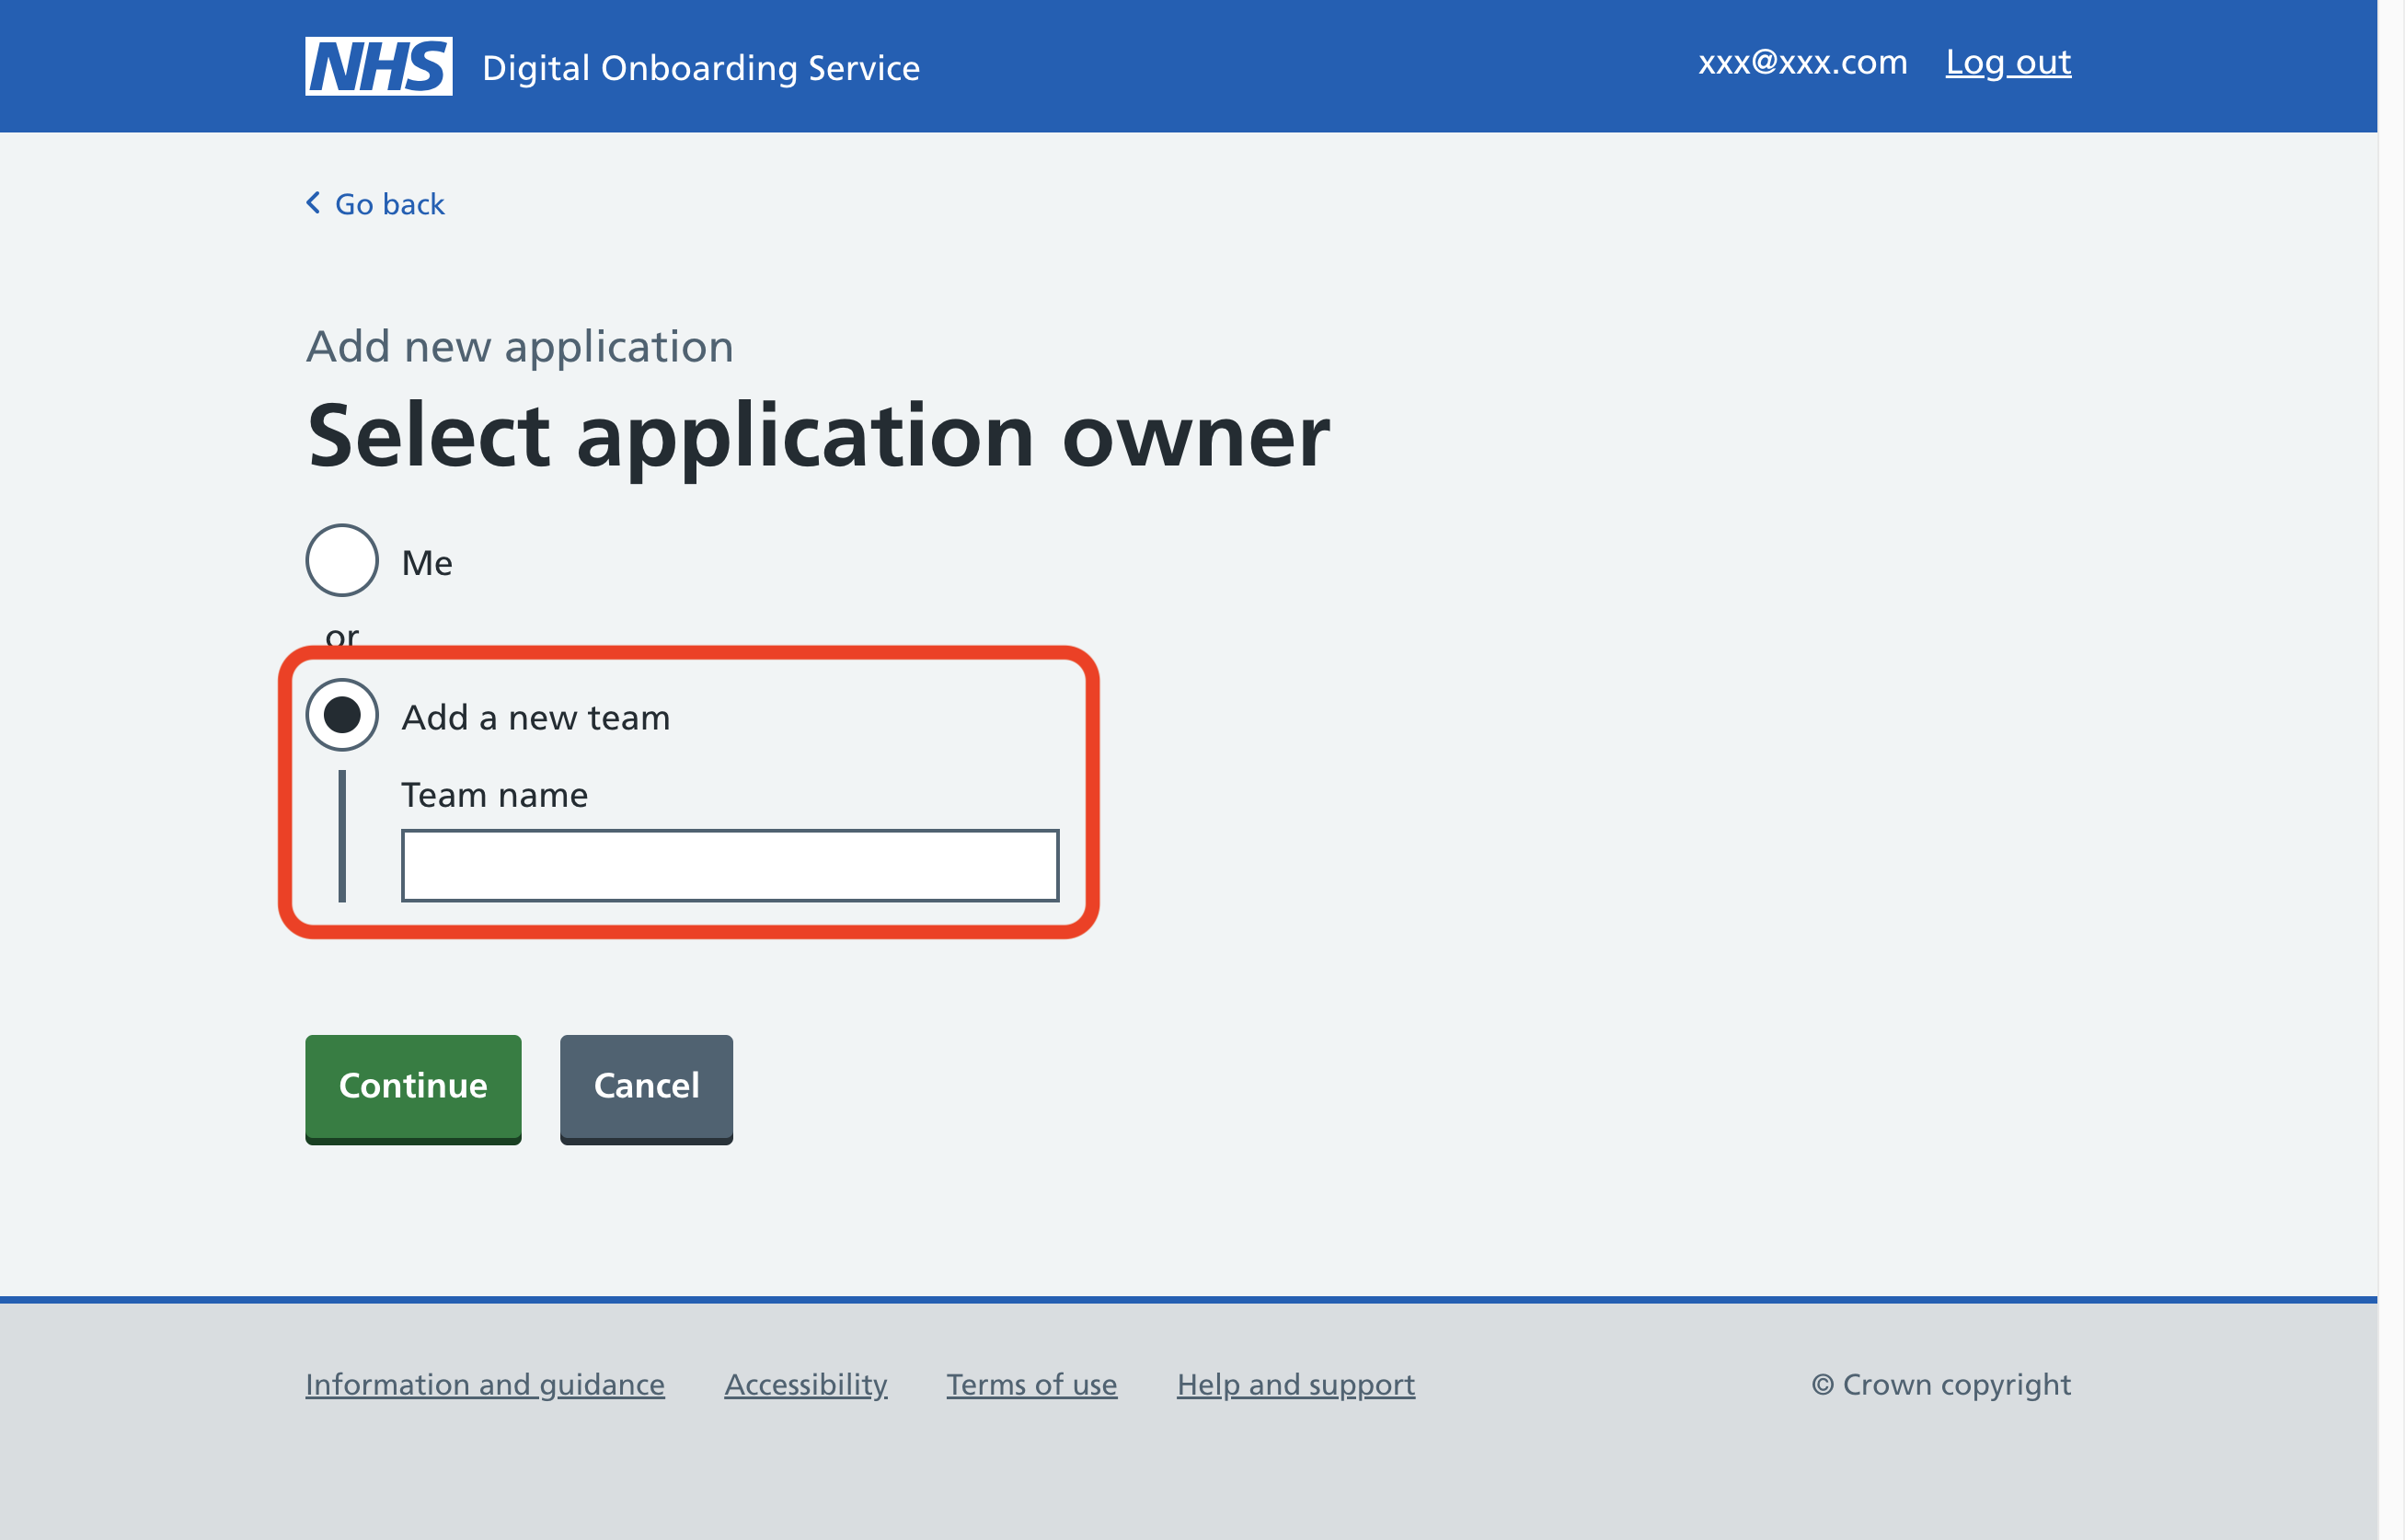
As an application owner, select 'Add a new team' and enter a team name.
You will be able to add members from your organisation to your team.
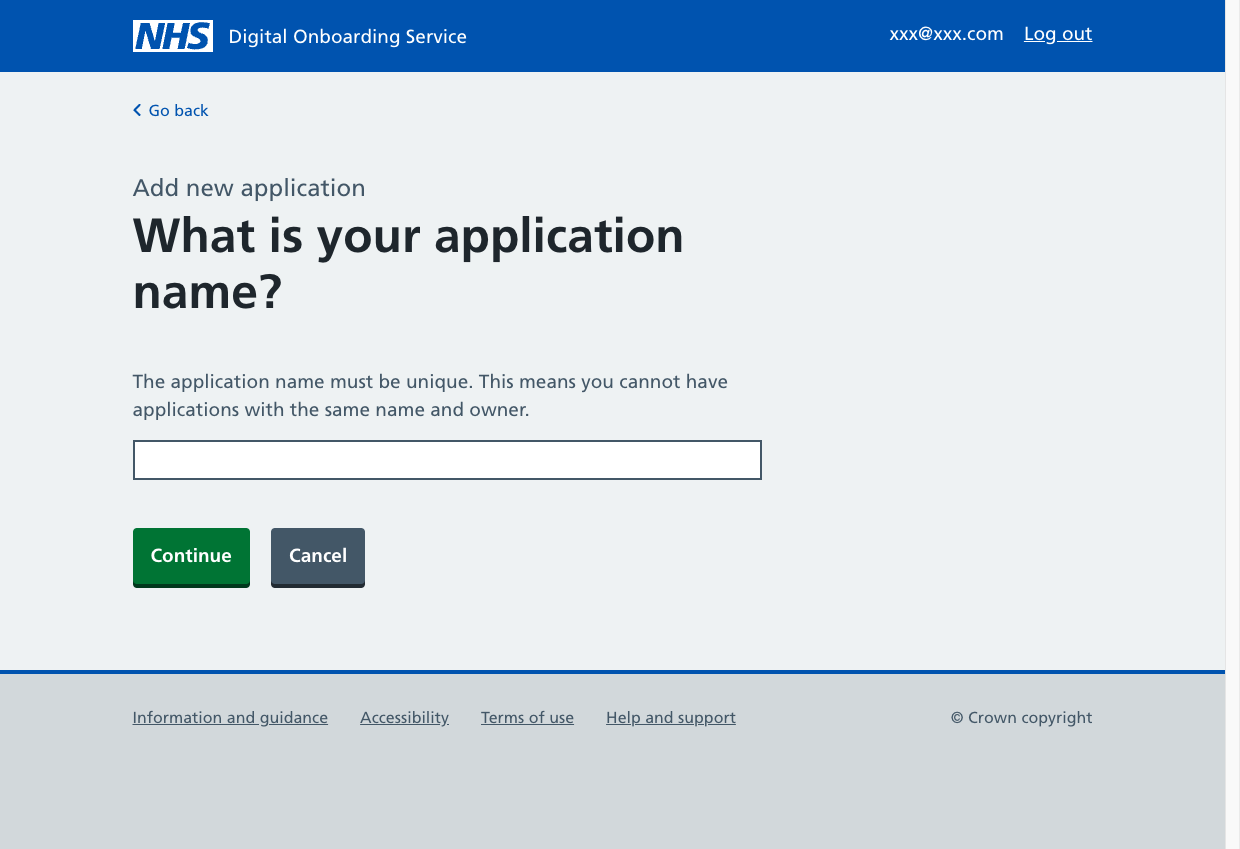
Give your application a name. Include the name of the environment so you can see which one is which. For example: 'organisation name - application name - environment'. You can change this name later if you need to. Click 'Continue'.
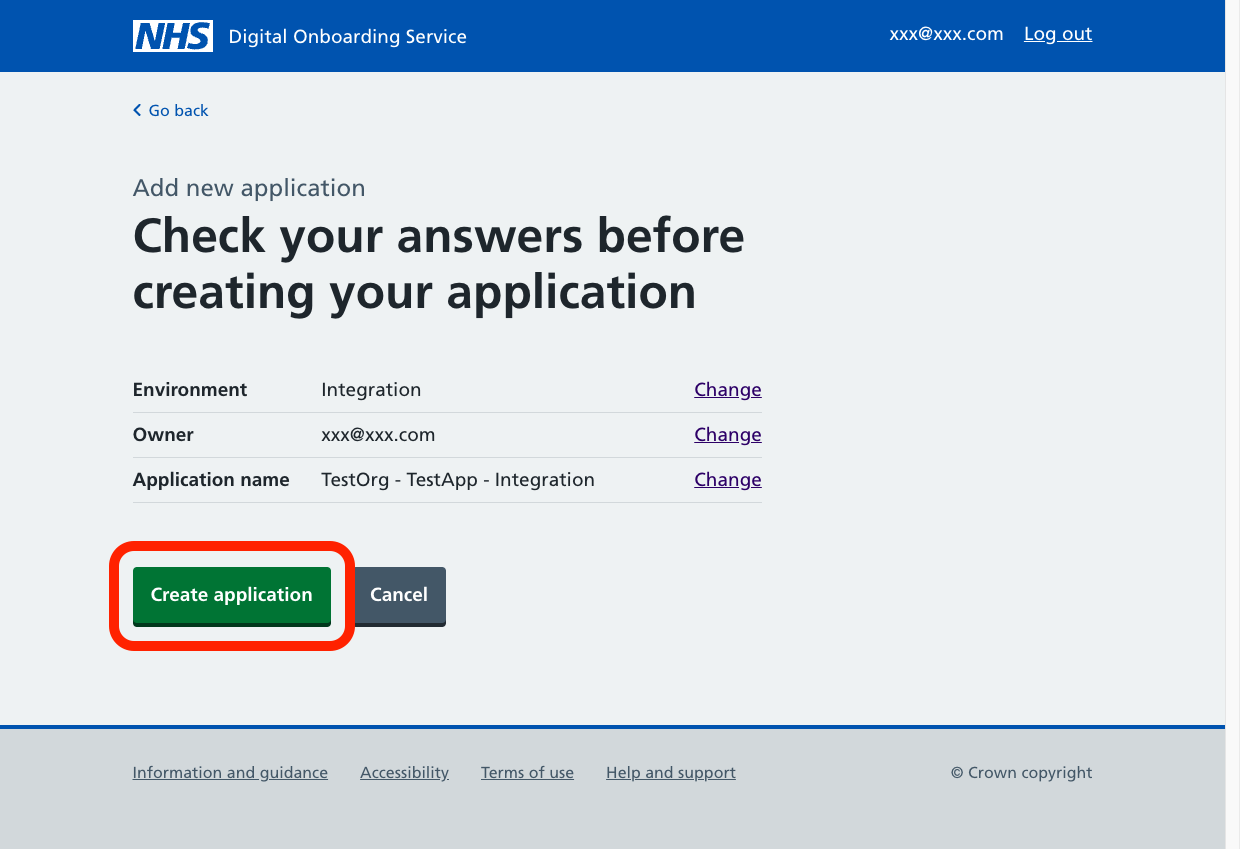
Check your answers are correct before clicking 'Create application'.
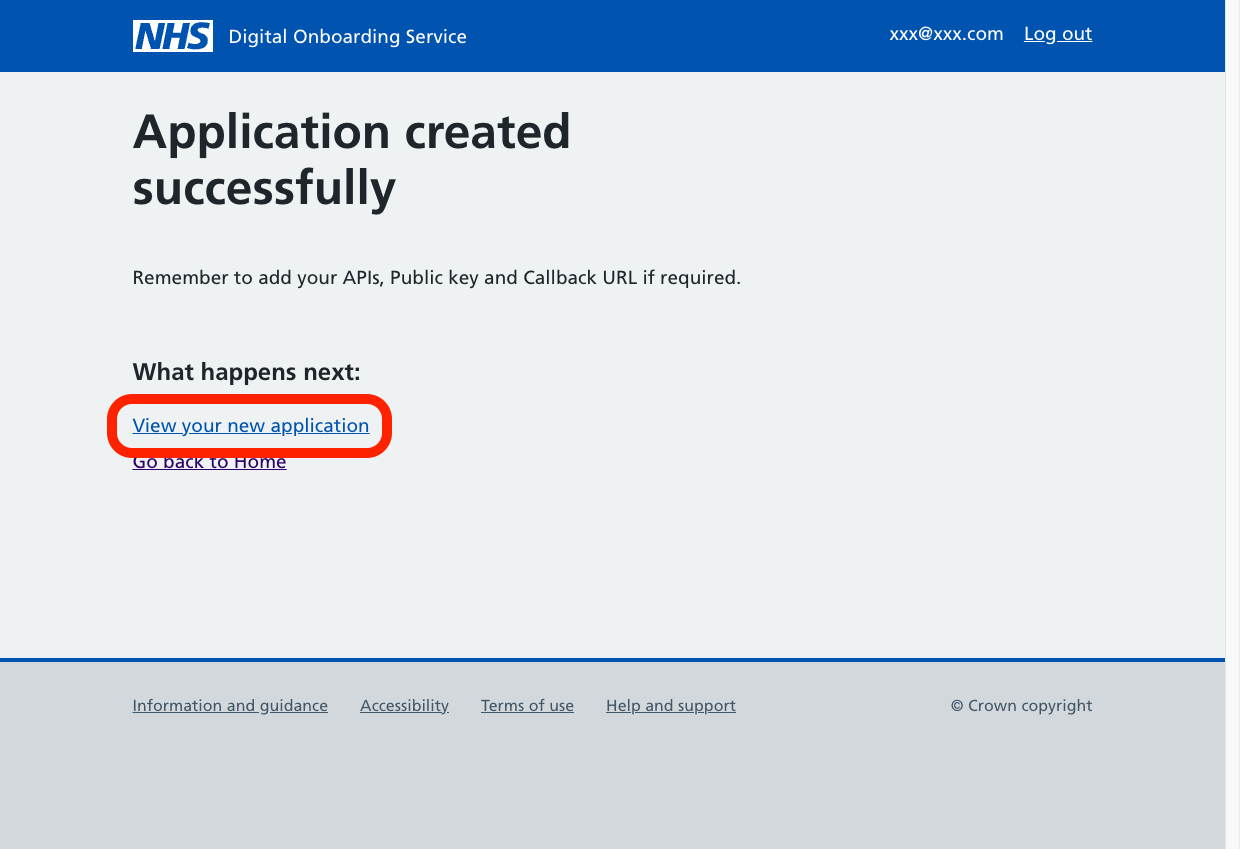
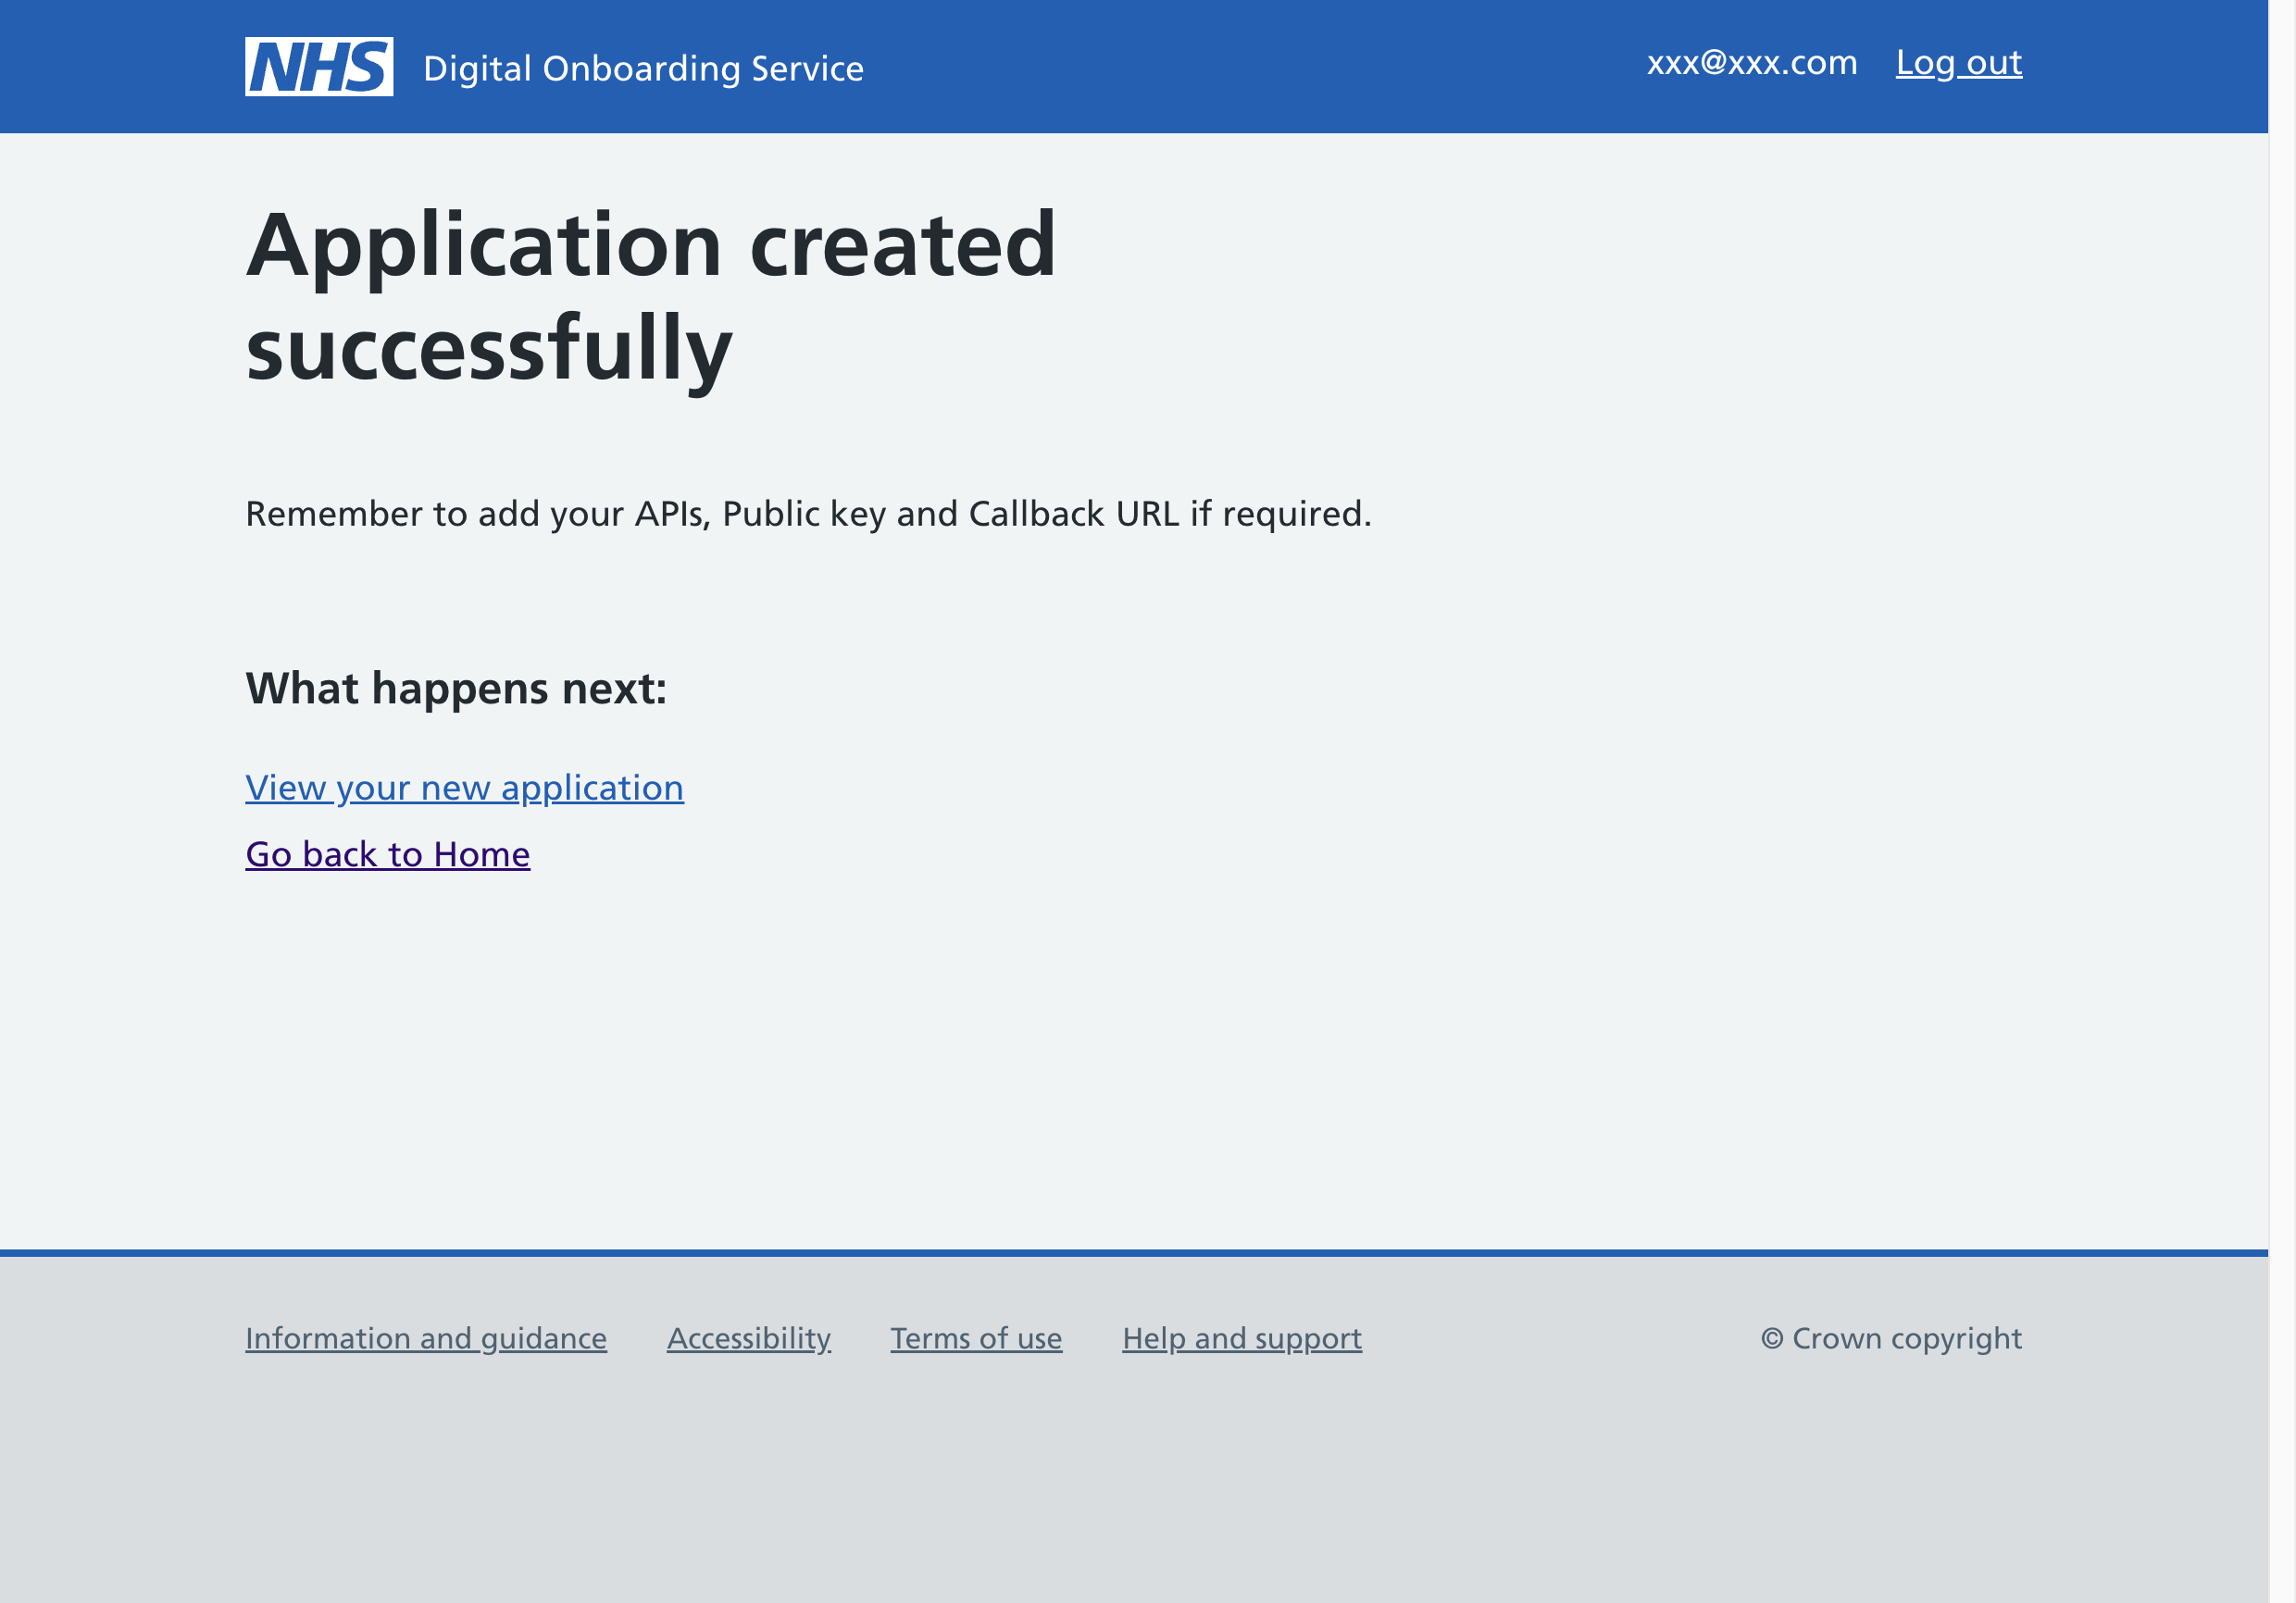
When you have set up your application, click 'View your new application', and click on the application name to see details about it and find out your API key.
To see the API key, click on 'Edit' next to 'Active API keys'. From here you can copy your key and store it somewhere safe.
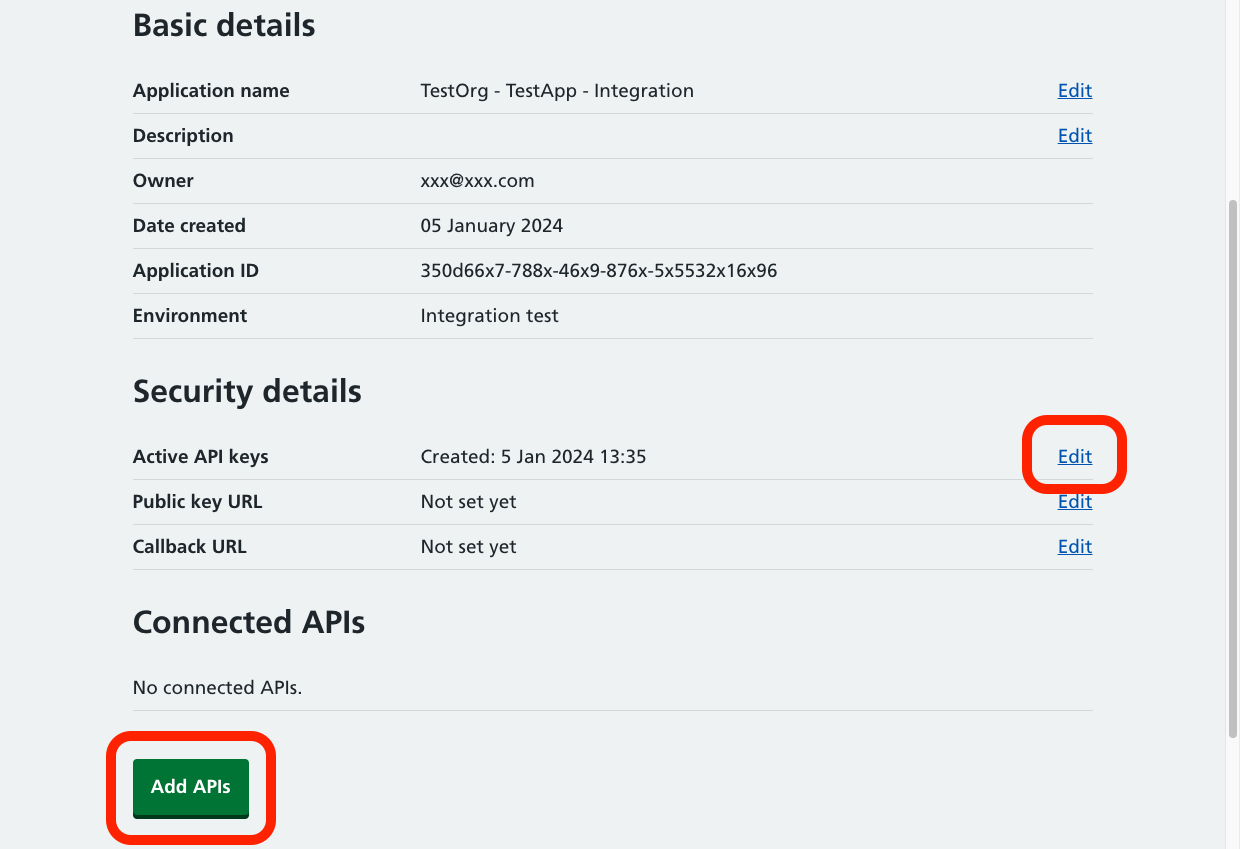
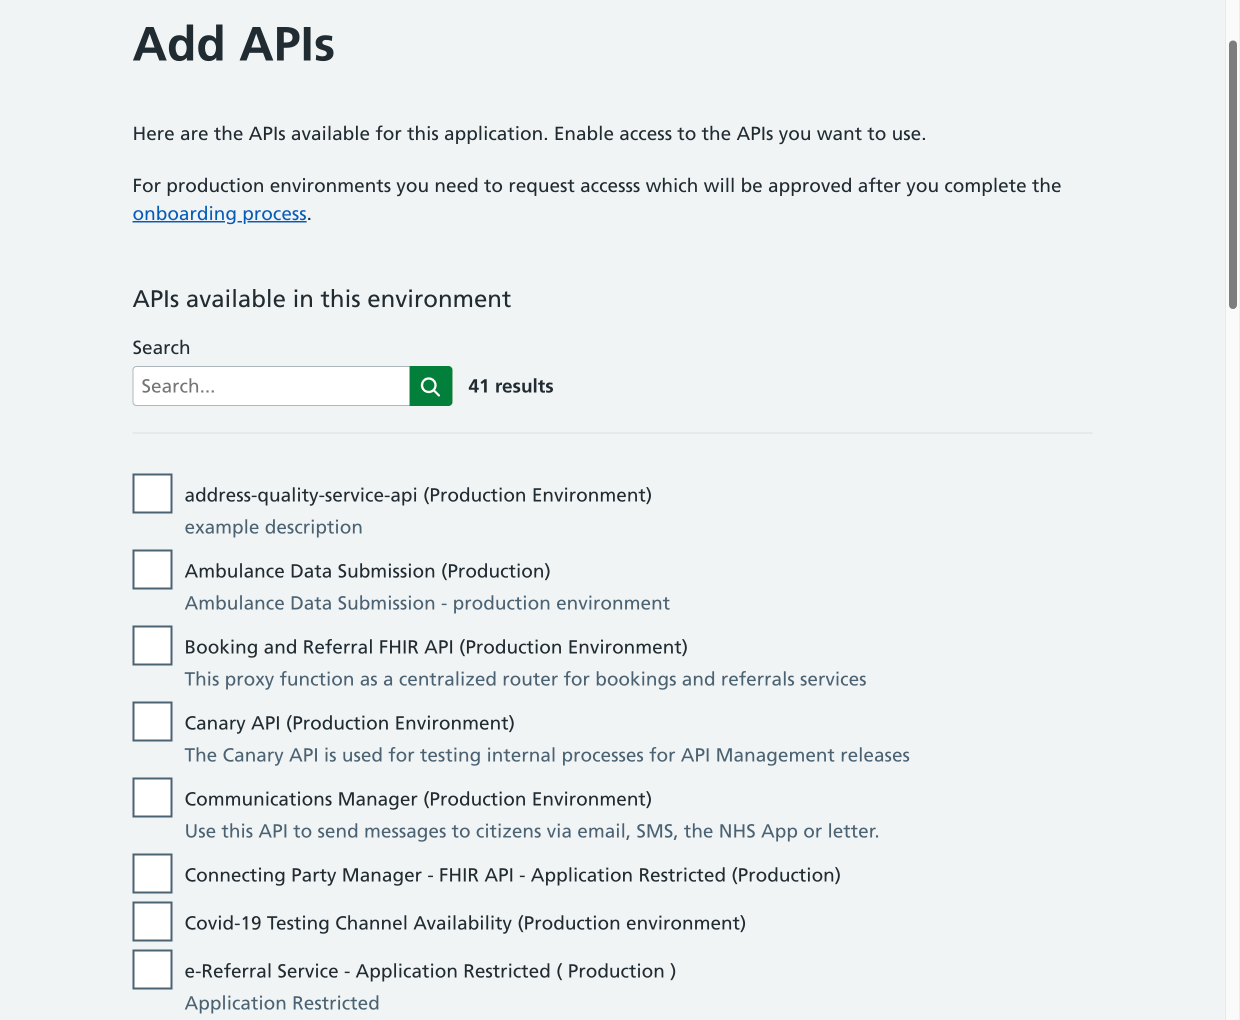
To add the NHS Website Content API to your product, click 'Add APIs'.
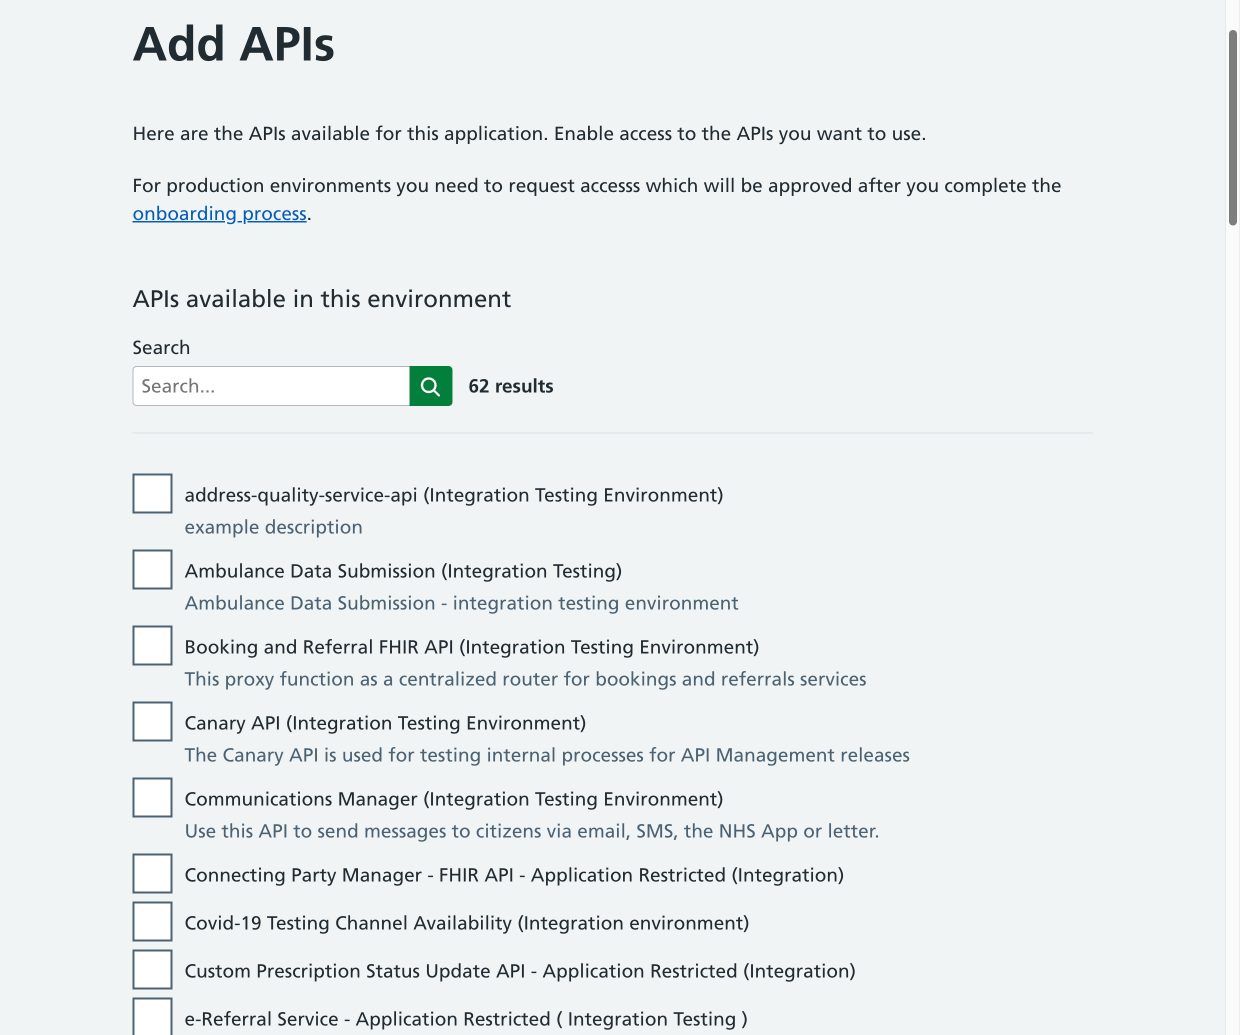
You will see a list of APIs that are available on the NHS England Developer and integration hub. Select 'NHS Website Content API' from the list.
Note that when you are in the integration test environment your use of the API will be limited to 120 requests per minute - you should not use the integration instance of the API in a public-facing application.
You can use our migration assistant to help you to implement the new API.
Step three: onboarding your product
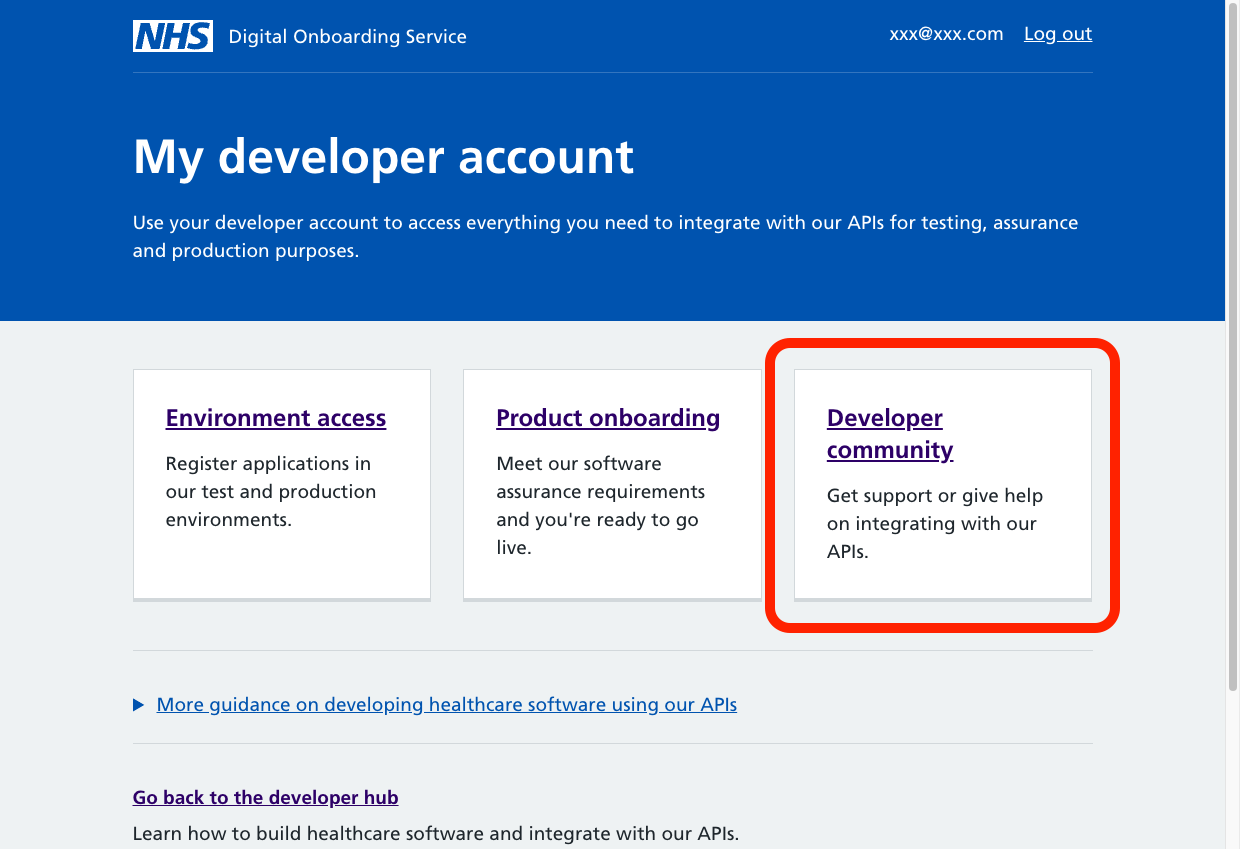
When you have set up an application in the production environment, you will need to go through the onboarding process. You can navigate back to the developer hub using the page links at the top of the screen underneath the blue banner. Click 'Home'
You will see this screen:
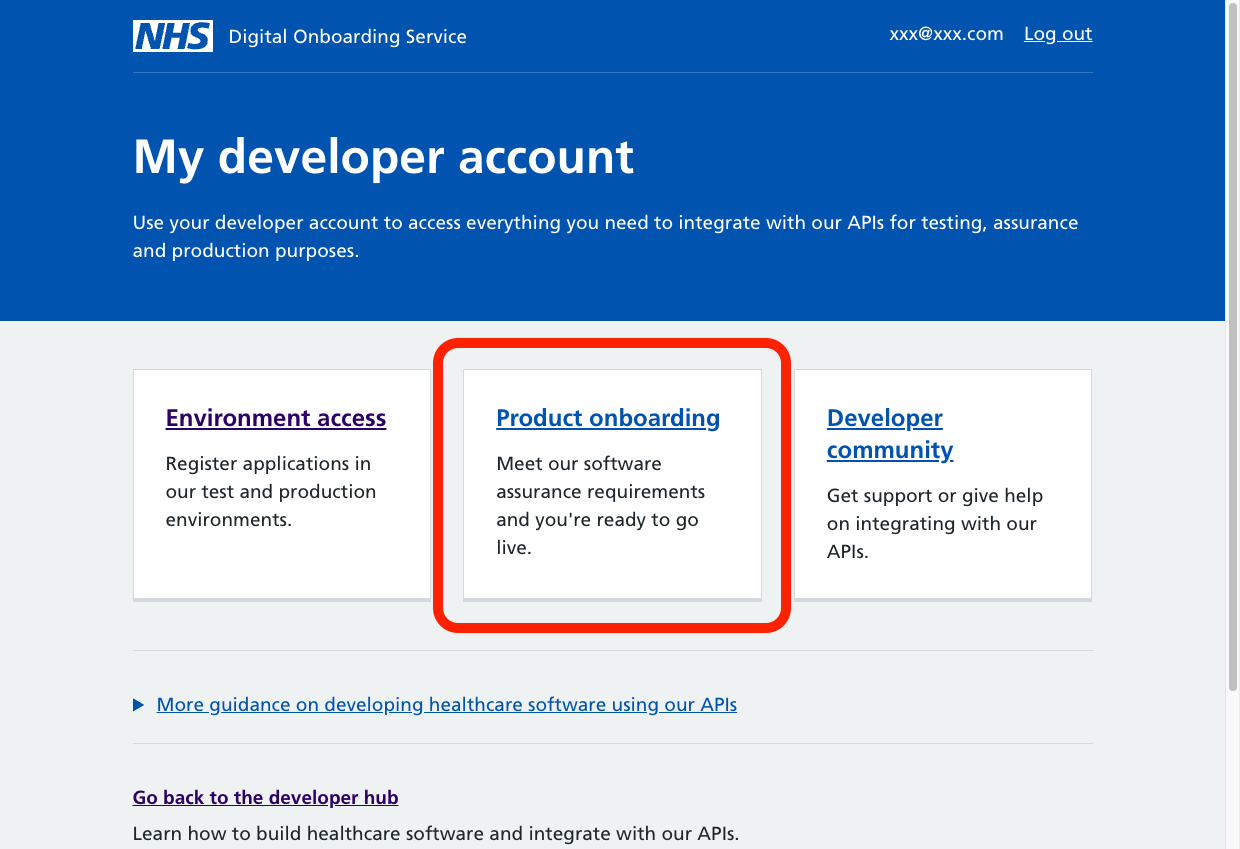

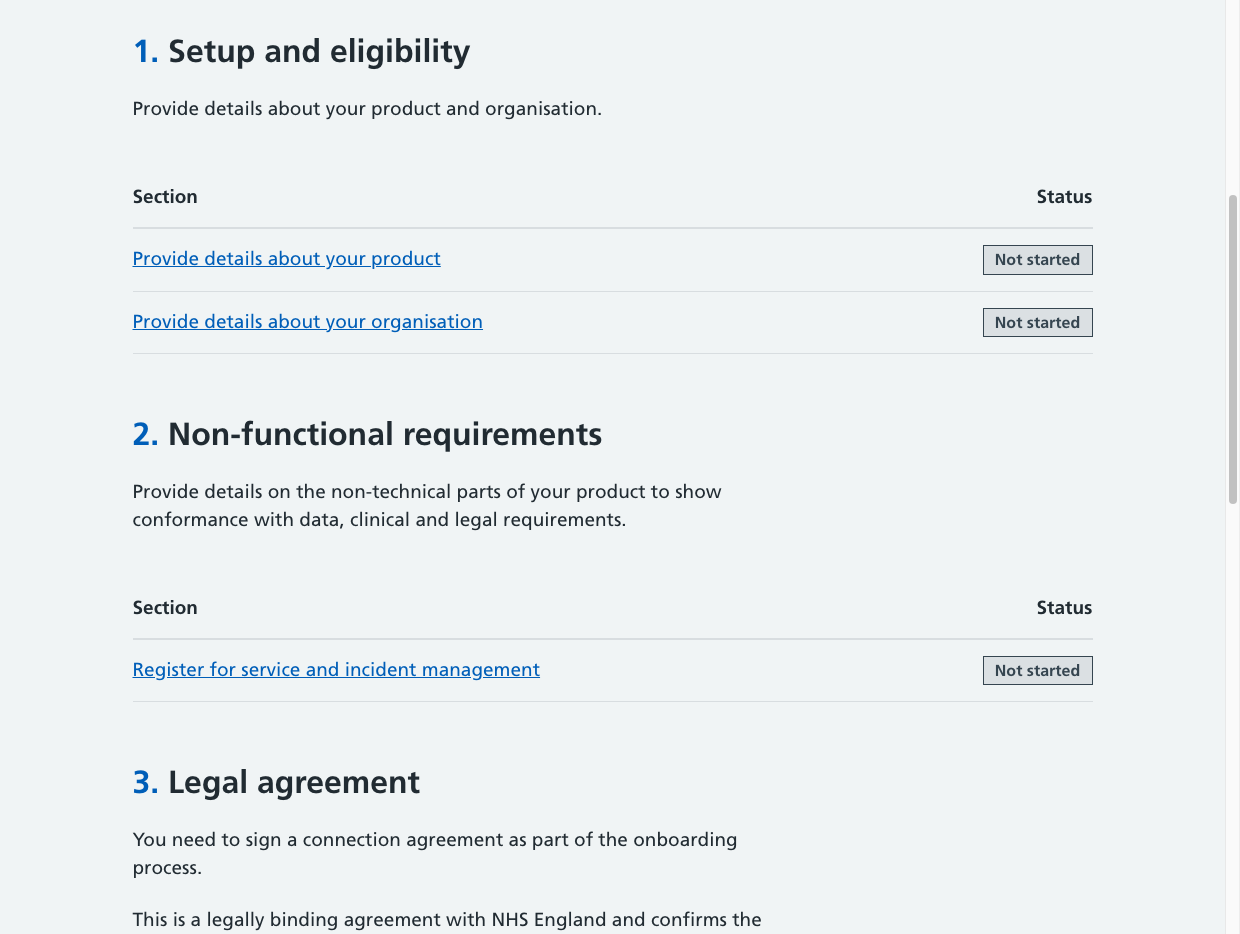
Click on the product name in the Digital Onboarding Service page. You will be taken to the digital onboarding steps that you need to complete.
These involve submitting some information about your organisation and the product that will use the API, and confirming you accept the terms of use of the API.
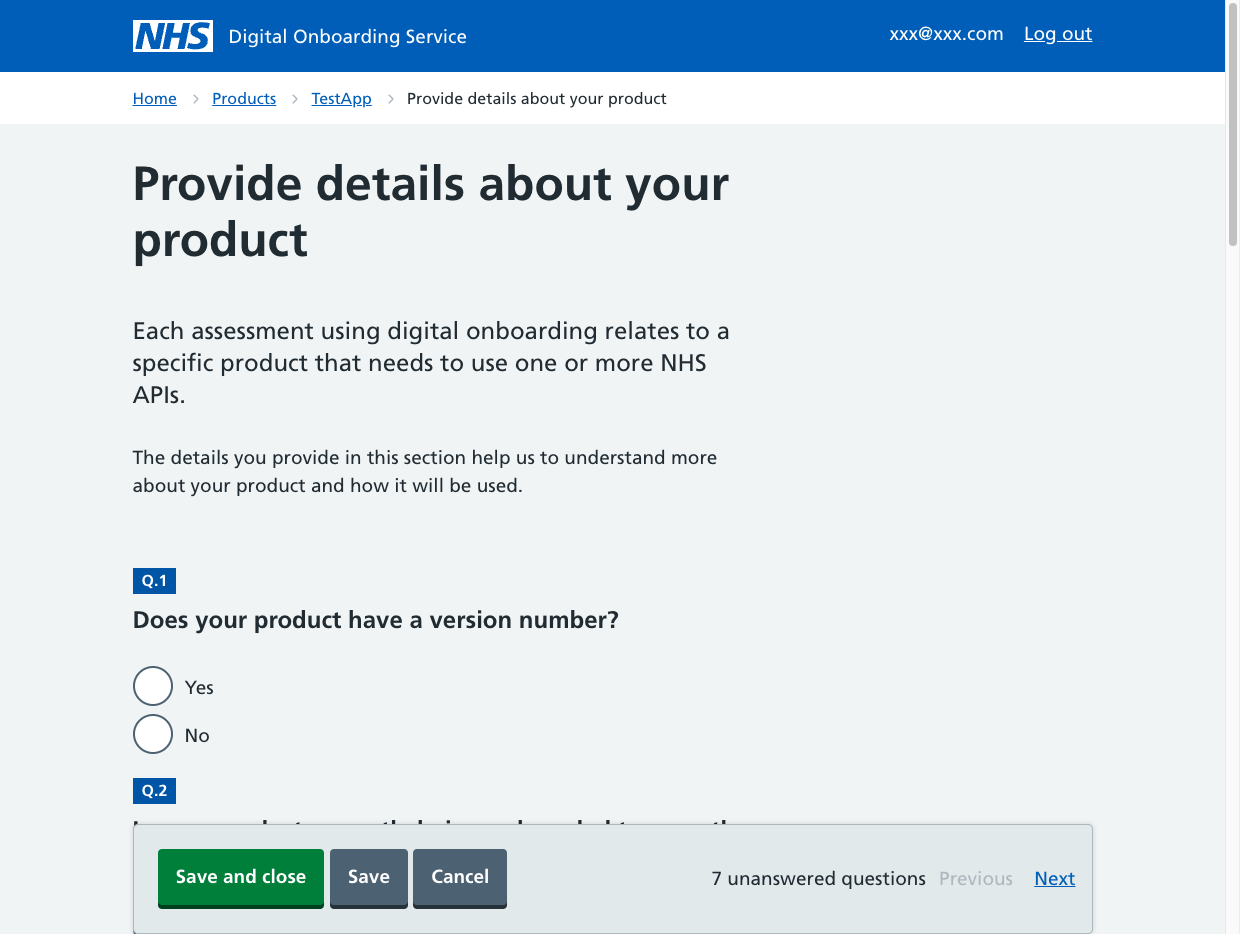
The 'Provide details about your product' page asks for information about your digital product that will be using the API.
You will be asked for the version number for your product (question 1), but you don't need to provide this if you don't have one - just select 'No'.
You need to indicate whether the product is already onboarded to or using any other NHS services (questions 2 and 3). 'NHS services' means 'NHS APIs'. Only select 'Yes' if you are already using one of the other APIs provided on the NHS England Developer and Integration hub. If you later start to use another API provided on the NHS England Developer and Integration hub, you don't need to come back and change your answer.
For question 7, if your product won't be used in a clinical care setting (e.g., it is public-facing) select 'Other' and provide details.
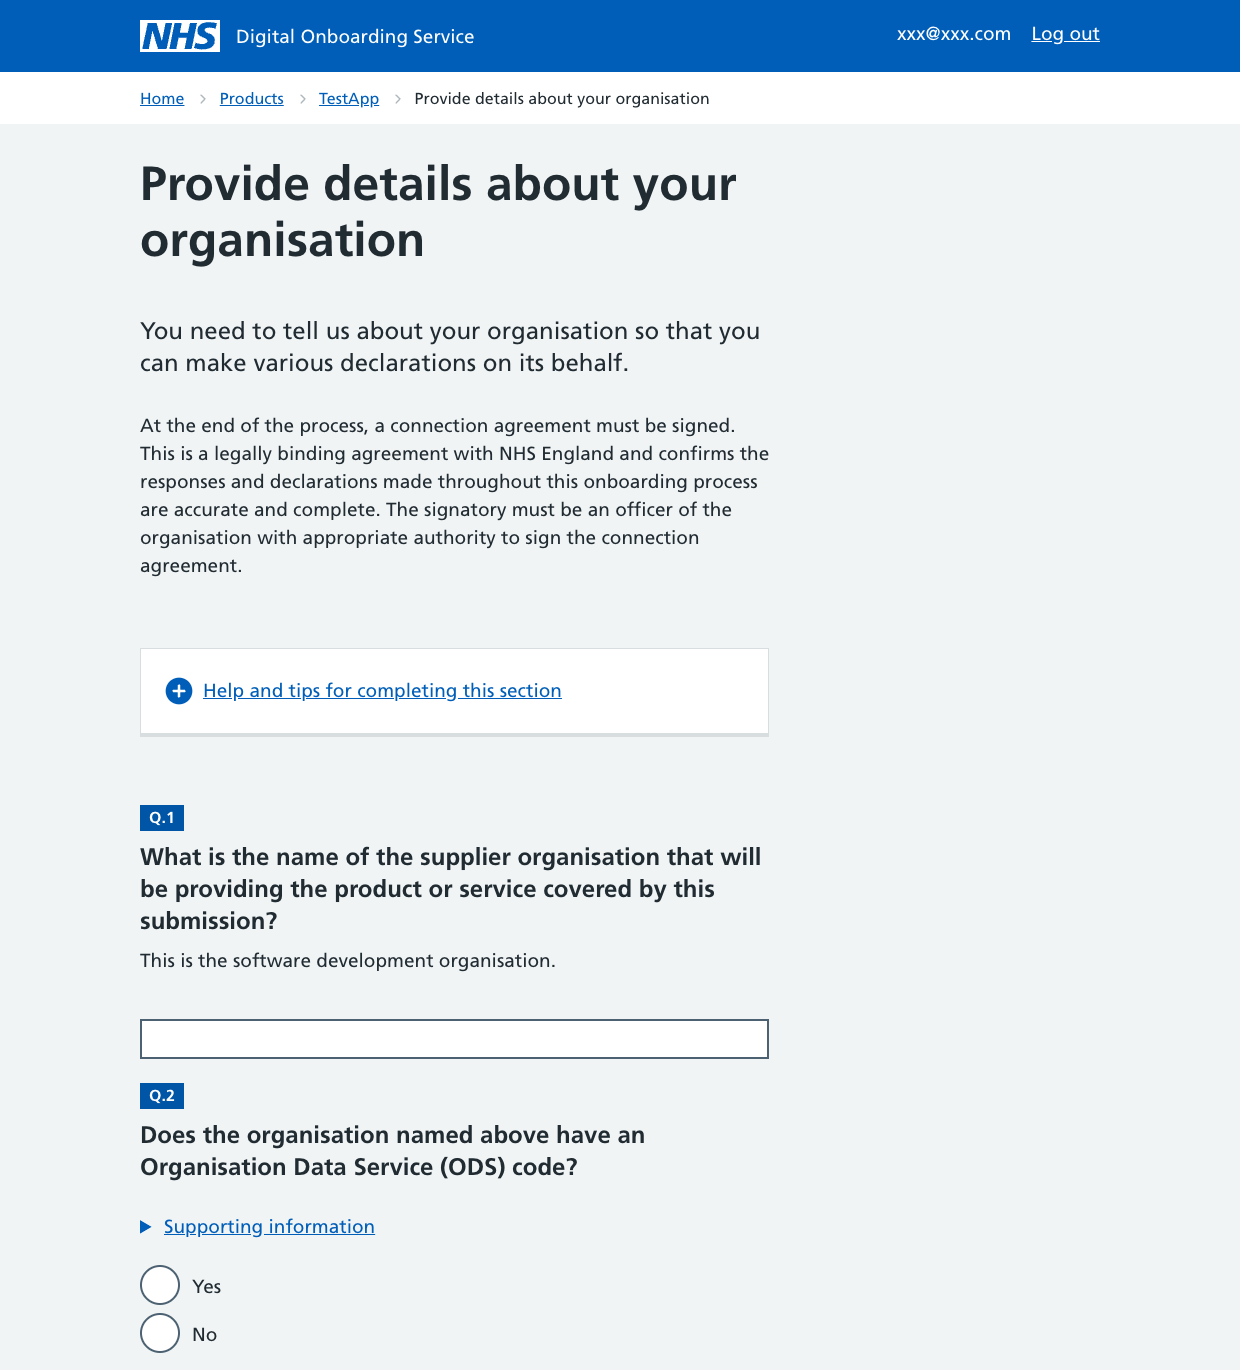
In the 'Provide details about your organisation' section you need to fill in information about your organisation - this is the 'supplier organisation' - including its ODS code if it has one. An ODS code is an administrative code used to identify NHS locations. You do not need to have an ODS code to use the NHS Website Content API.
The organisation commissioning the product is the organisation you are developing the product for if there is one.
Enter your name as the contact person responsible for submitting onboarding details on behalf of the organisation.
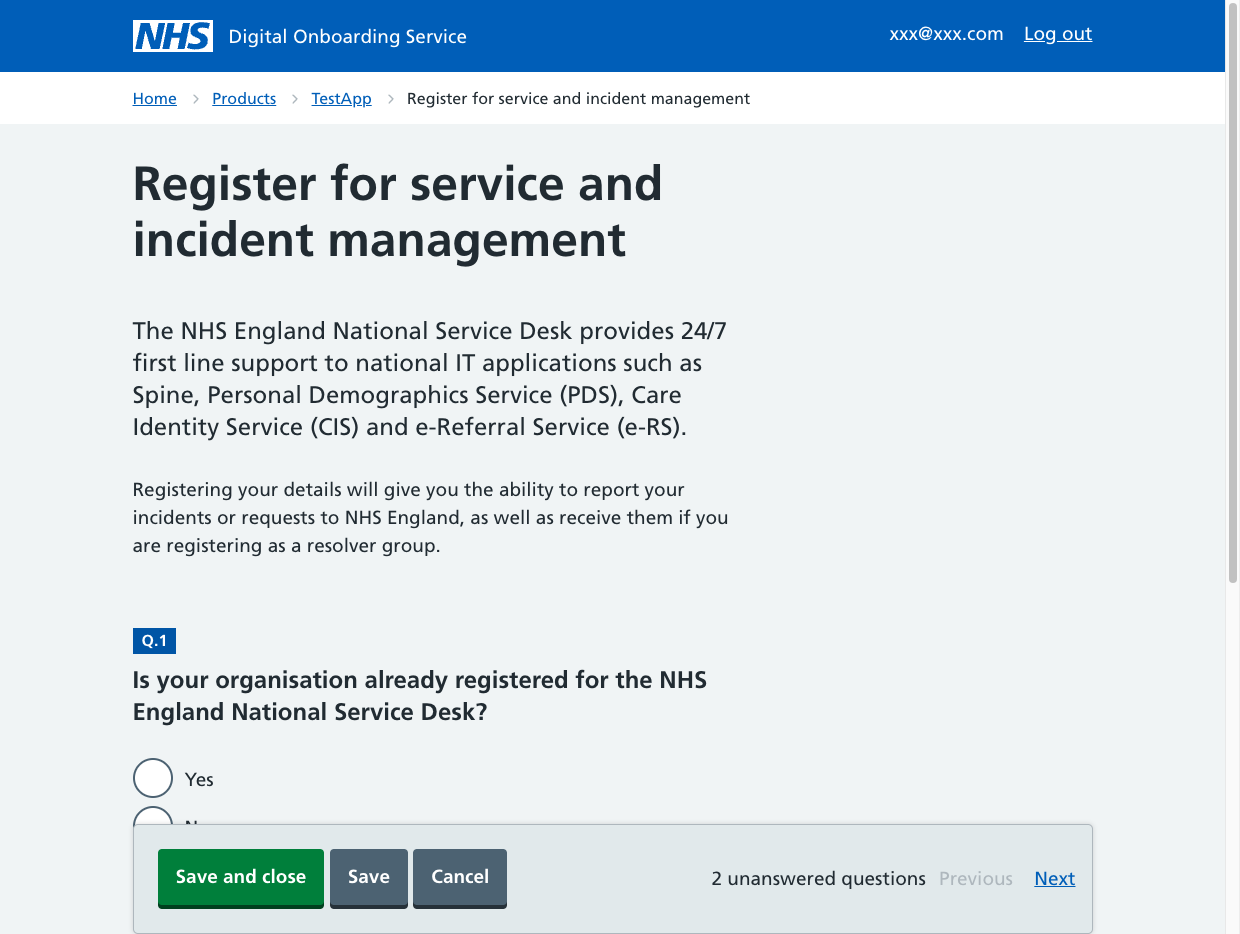
The 'Register for service and incident management' section asks questions about your arrangements to manage incidents. Please note that you are not required to register with the NHS England National Service Desk or have an incident management process in place in order to use the NHS Website Content API.
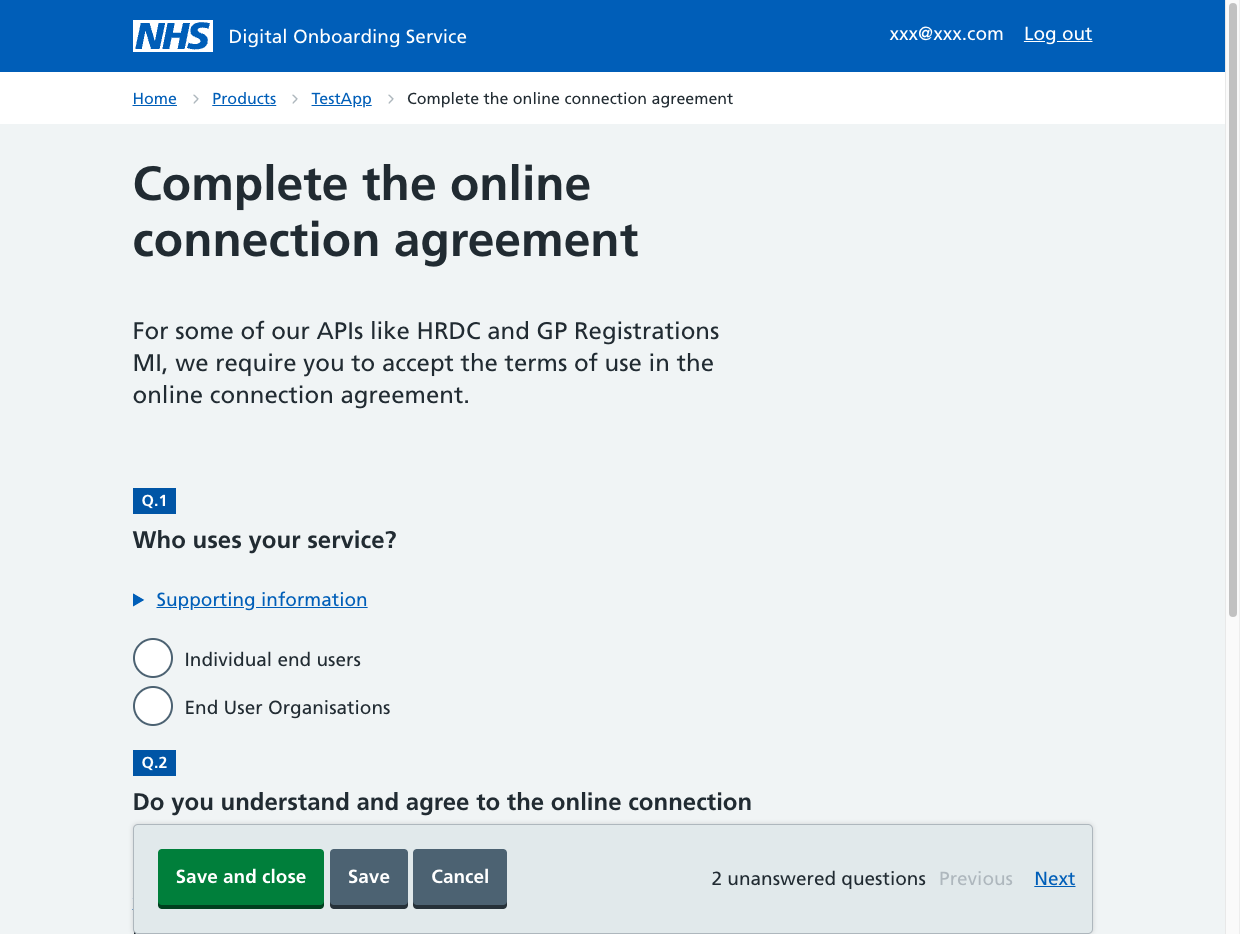
In the next section you will need to provide information about the users of your service, and indicate that you have read and agreed to our connection agreement (terms and conditions).
When you have submitted your answers for all sections, these will be forwarded to the NHS website Syndication team who will check them and approve your request to use the API. They will aim to do this within two working days of you submitting your request.
You will receive emails to tell you that your request has been approved, and you can then start using the API in the production environment.
You have now successfully onboarded with the NHS Website Content API.
To implement the API, you need to change the endpoints you are currently using to consume the NHS.uk APIs. You will need to change this from 'https://api.nhs.uk/' to 'https://api.service.nhs.uk/nhs-website-content/'
You need to add your new API Key (this used to be 'subscription-key') to the request header. The code to use is as follows:
headers: {
    'Content-Type': 'application/json',
    'apikey': 'YOUR_NEW_API_KEY_GOES_HERE'
}
You can use our migration assistant to help you implement the new API
Don’t forget that you will need to display our attribution graphic alongside all instances of our syndicated content. See NHS Website Content API v2 for more information.
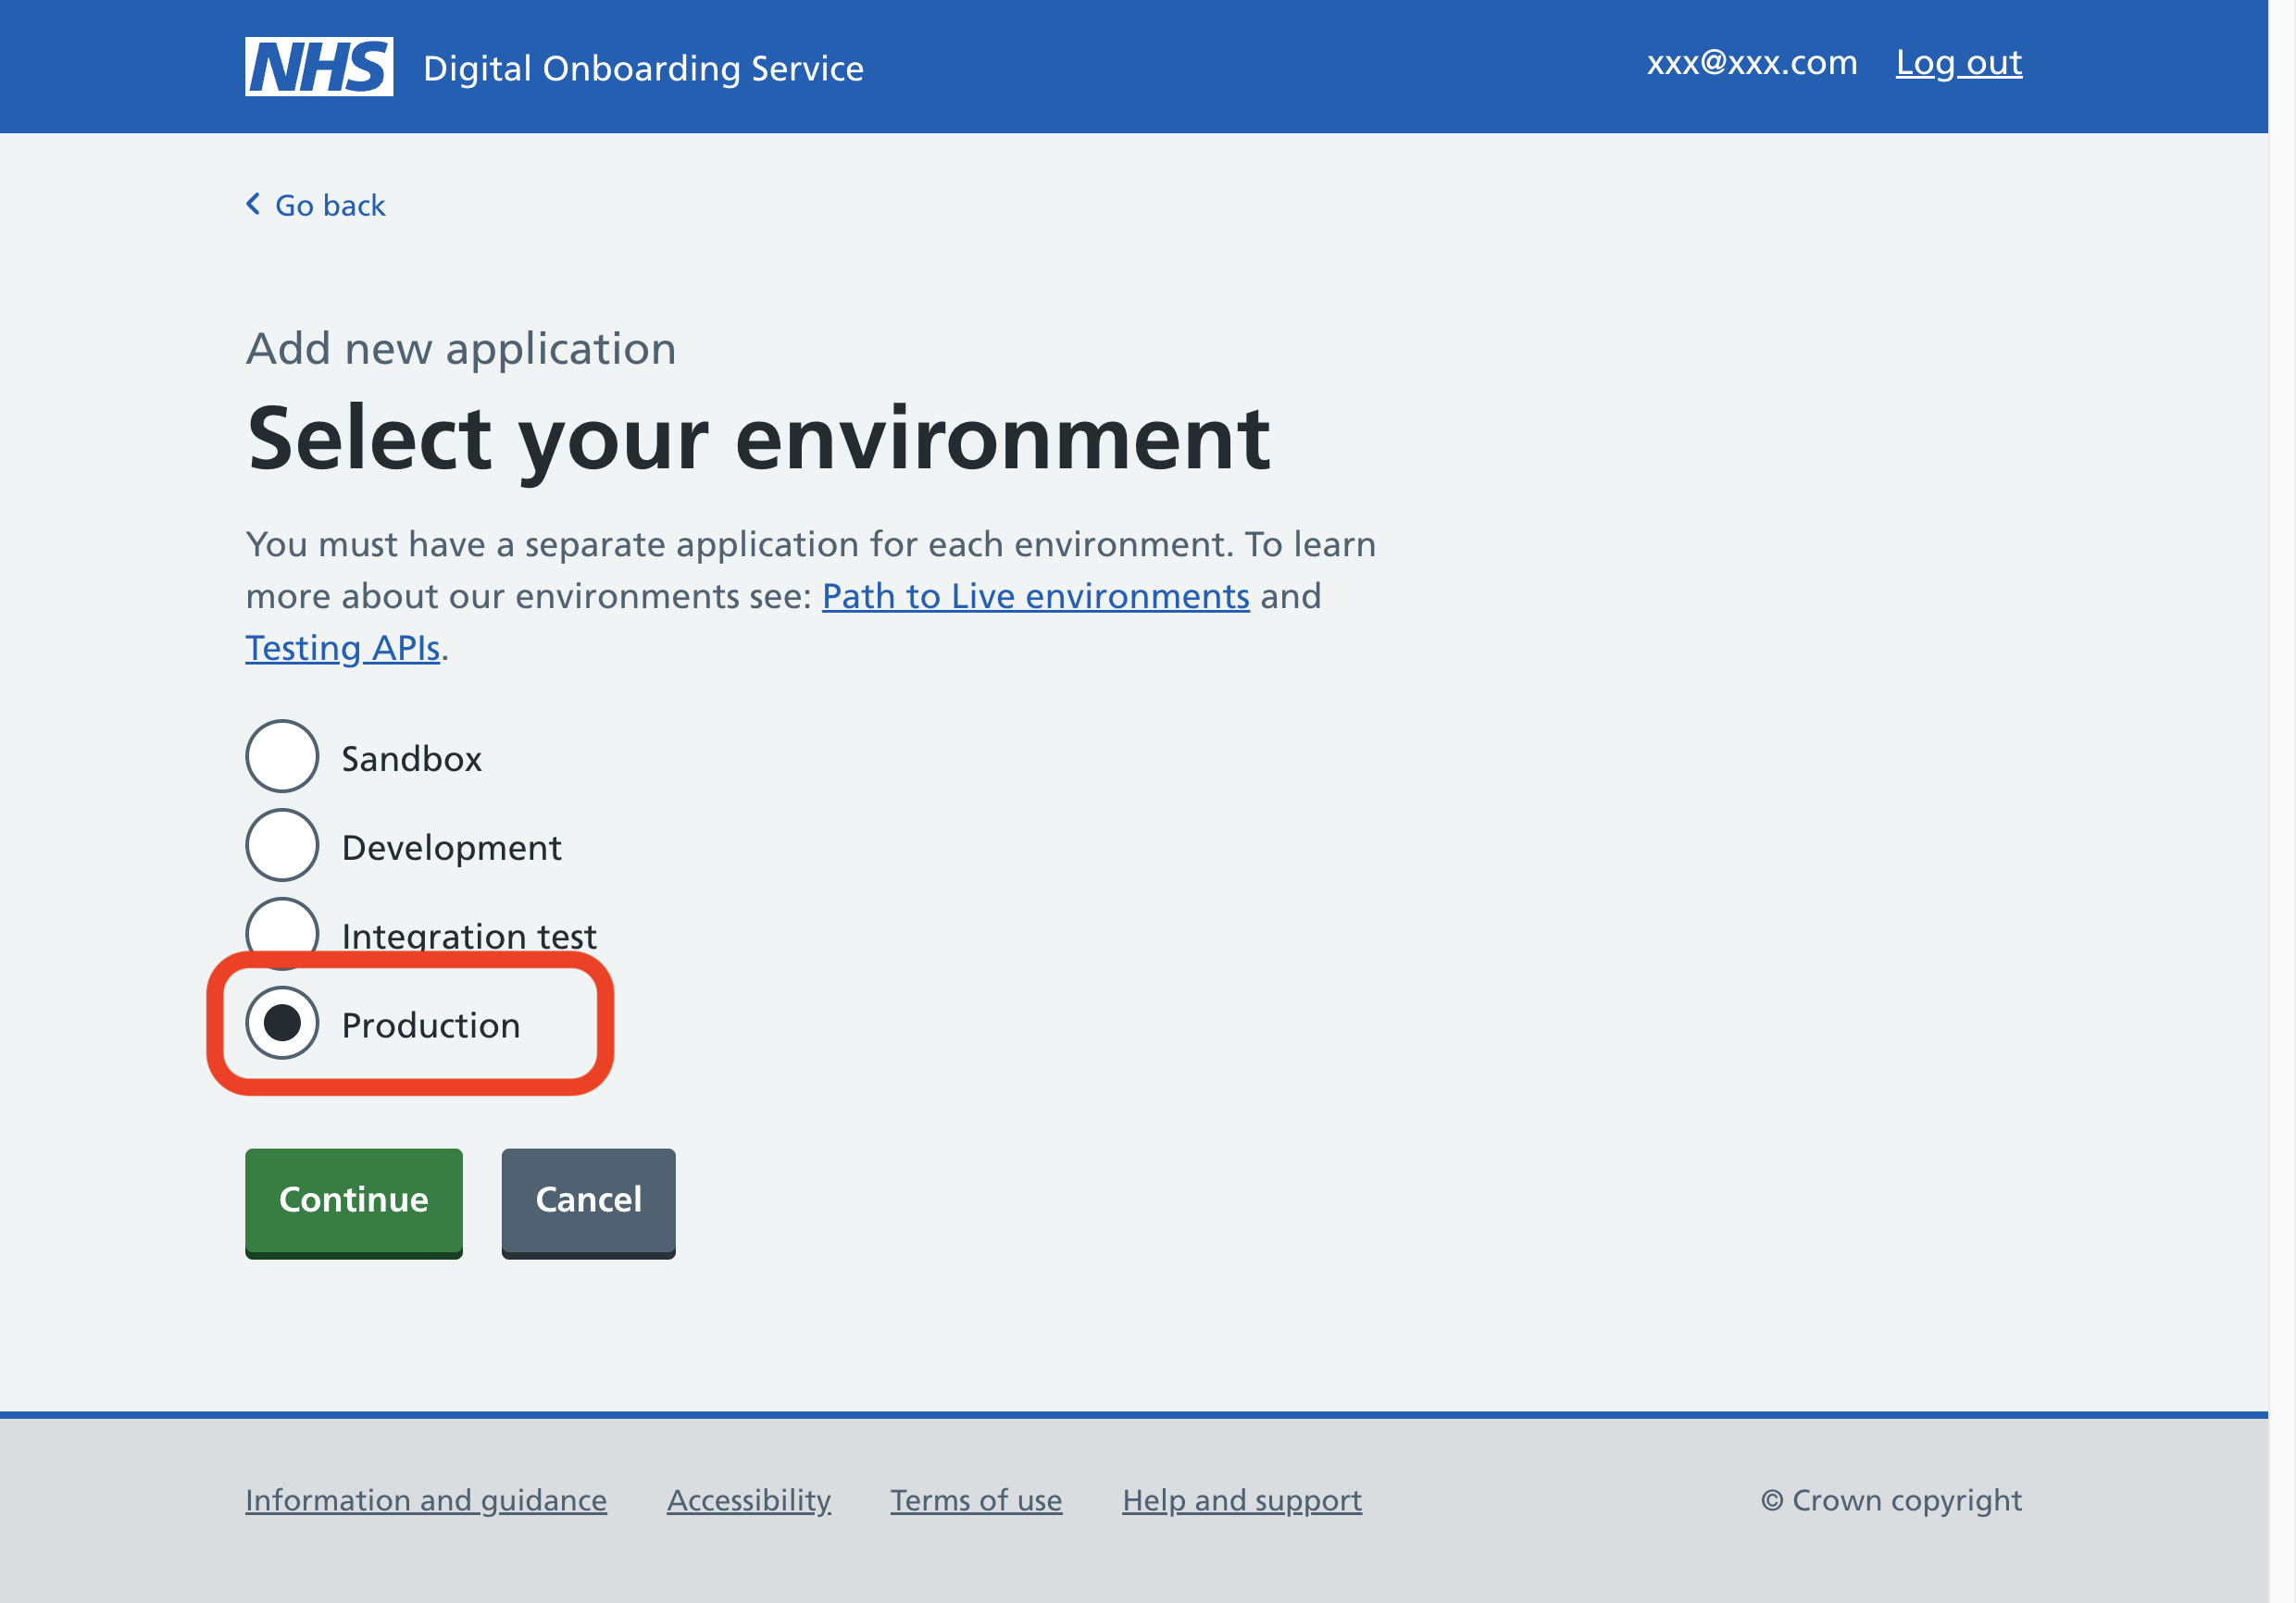
Step four: setting up your application in the production environment
Once you have completed the onboarding steps, you will then need to set up an application in the production environment to start using the new API in production.
Click the 'Environment access' link
Click 'Add new application'.
You will need to set up a new application in the production environment, even if you have already set one up in the integration test environment.
Select the 'Production' environment when you are starting the set up of your application.
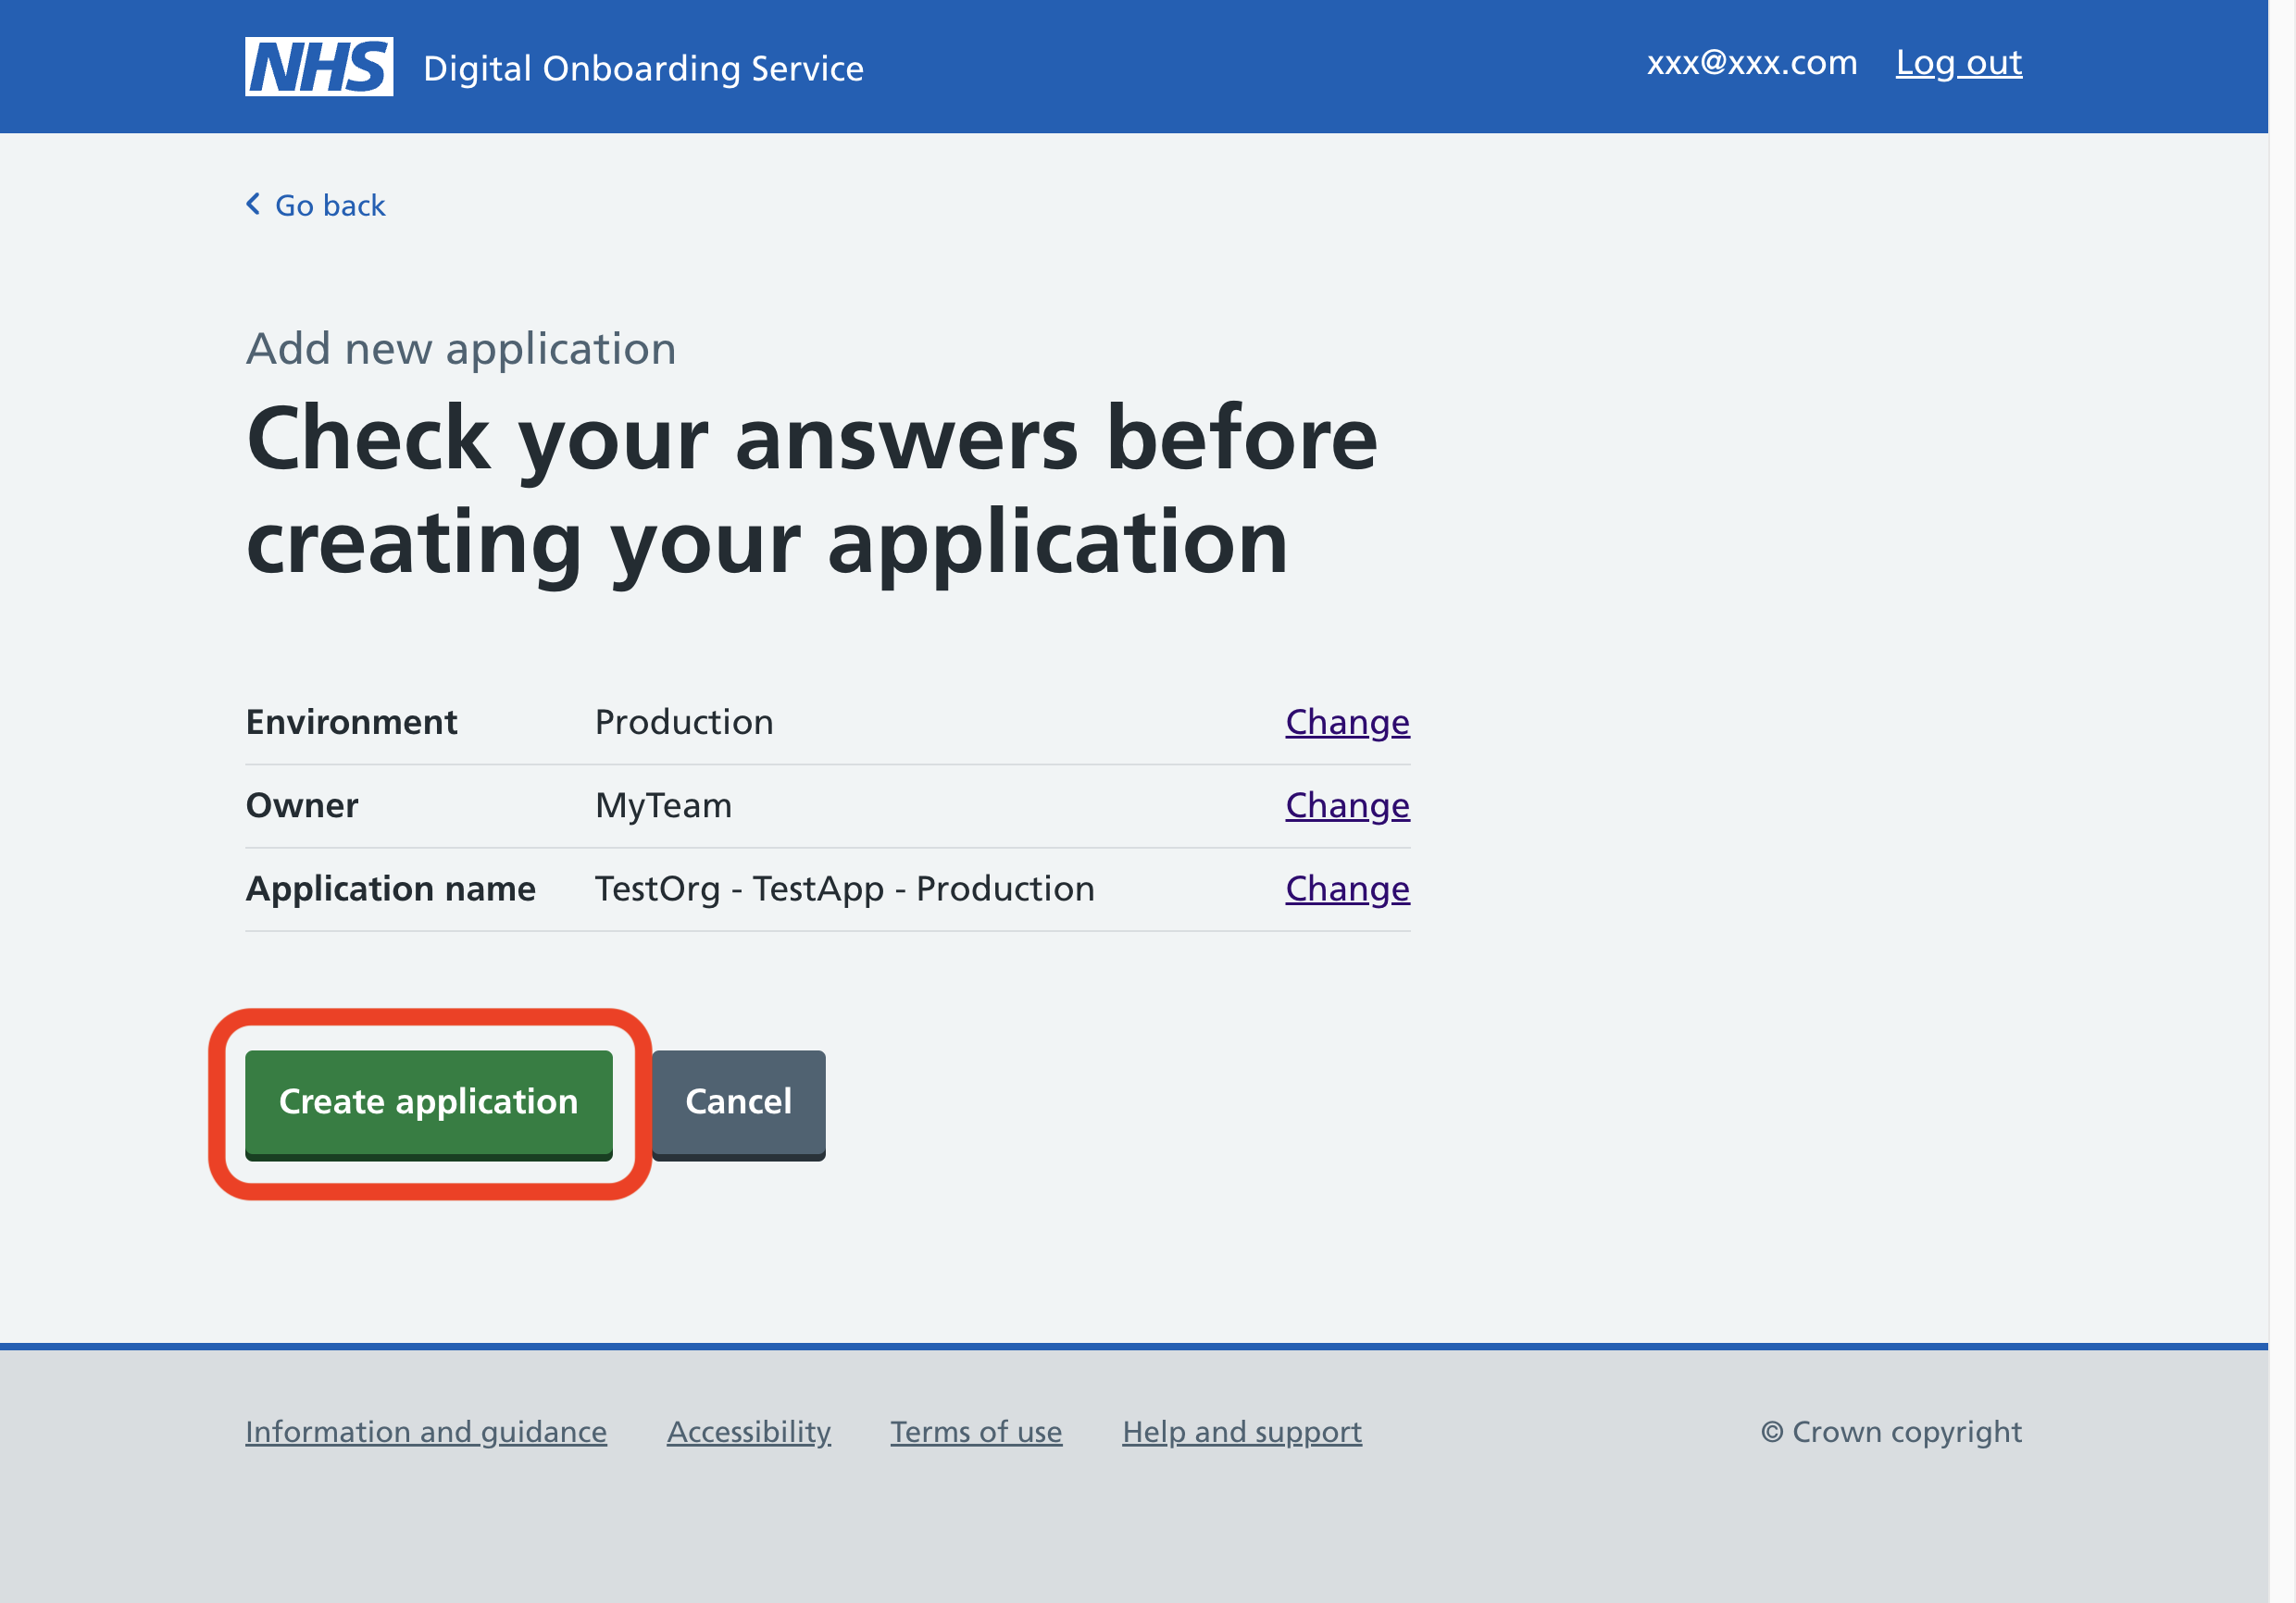
Give your application a name, including 'production' so you know which environment each application is using. Click 'Continue'.
Check your answers are correct before clicking 'Create application'.
When you've set up your application in production, send us an email to sally.boyes@nhs.net with the subject 'Production application' so we can get your application up and running.

When you have set up your application, click 'View your new application', and click on the application name to see details about it and find out your API key.
To see the API key, click on 'Edit' next to 'Active API keys'. From here you can copy your key and store it somewhere safe.
To add the NHS Website Content API to your product, click 'Add APIs'.
You will see a list of APIs that are available on the NHS England Developer and integration hub. Select 'NHS Website Content API' from the list.
You will be required to use multifactor authentication to access the API key in the production environment.
When you are using the API to publish content to a live product, you should only use the production environment.
When you are using the API in production, the use of the API will be limited to 1,200 requests per minute.
You can use our migration assistant to help you to implement the new API.
Get support from our team and other API users
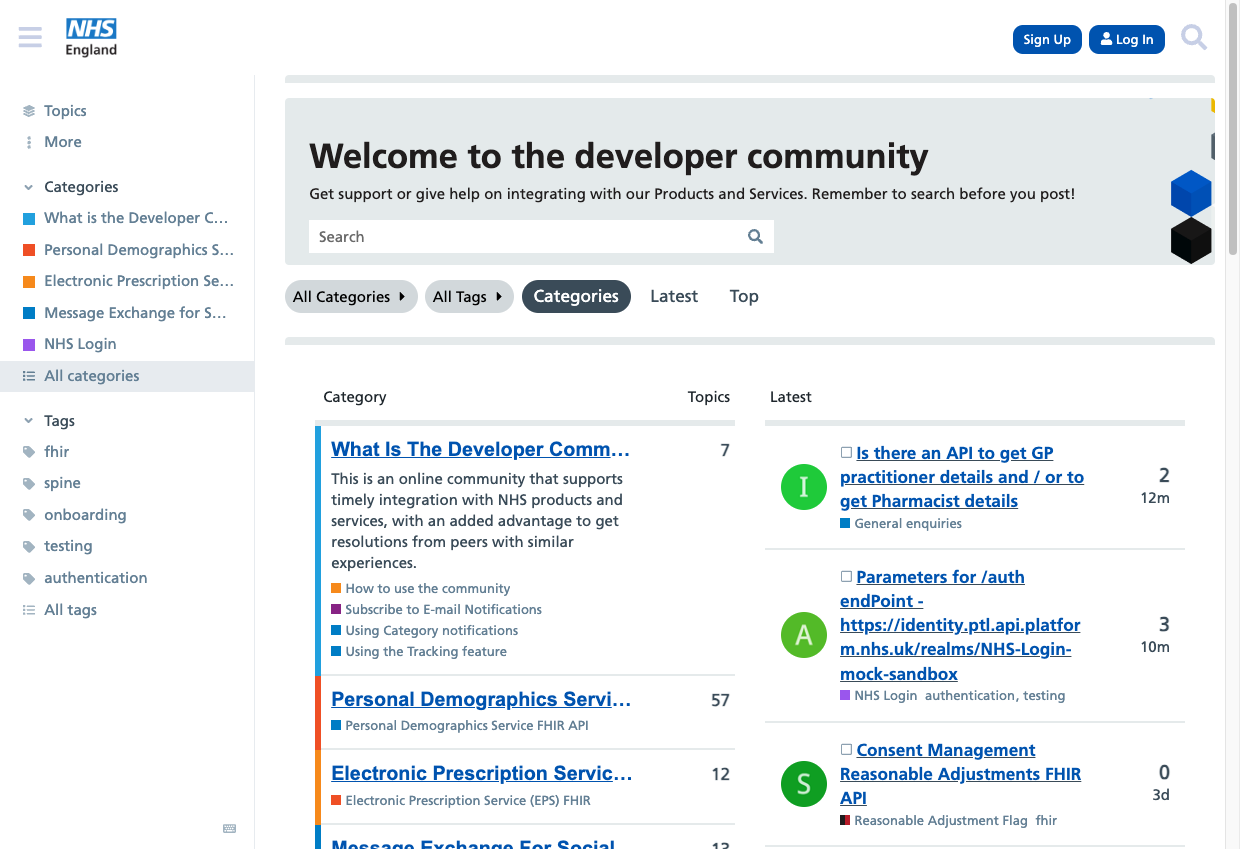
You can join the APIM developer community to ask questions and get support from the team and other users. The community will be monitored and any queries will be picked up from here.
You should receive a response within 48 hours. To ensure your query gets a quick response, be sure to select the 'NHS Website Content API' category so that the team can see it.
You can also still use the NHS website service desk contact page to raise queries.